Disclosure of Material Connection: Some of the links in this post may be "affiliate links." This means if you click on the link and purchase an item, I will receive an affiliate commission. Disclosure in accordance with the Federal Trade Commission's 16 CFR, Part 255. This site is a participant in the Amazon Services LLC Associates Program, an affiliate advertising program designed to provide a means for sites to earn advertising fees by advertising and linking to Amazon.
I don’t remember where I first came across this idea (somewhere online, I’m sure), but it is a keeper! You can also purchase these on Etsy, if you prefer. A personalized etch glass baking pan makes for a fantastic and affordable gift, perfect for a housewarming present, wedding shower gift, birthday or Christmas.

The first time that I made these, I was extremely lucky and had been wanting to do it for a little while… Then there was a huge renovation sale at my local Canadian Tire. I was able to scoop up a whole bunch of Anchor-Hocking 8×8 and 7×11 pans for very good prices. There are even still some in my stash. Lately, I have found the giant pyrex batter bowls with lids on sale frequently at Canadian Tire, as well as some baking pans with insulated carrying cases.
I bought the large bottle of Armour Etch Cream at Michaels, knowing that I wanted to make a lot of pans but not knowing how much I would go through. A little bit goes a very long way and I think you have to make over a hundred items before you need the large bottle. Note that this stuff is pretty darn dangerous, make sure to follow all of the safety precautions. It is also a bioaccumulator, so be extra careful to avoid any contact. Here is a link to the Material Safety Data Sheet that you should take a look at before using the product. I store my bottle in a ziplock bag, so that it can’t leak onto anything else and wreak havoc, including my hands! It also prevents any crusties that form on the lid from ending up on my hands or falling off onto things.
Personalized Etched Glass Baking Pan Tutorial
What you will need:
- Glass Pan or other Item
- Disposable Gloves
- Plastic Spoon or Paint Brush
- Contact Paper – you can get specifically made paper, or use the stuff for lining drawers
- Exacto Knife or Cricut
- Dish Soap
- Tape – Scotch, Hockey or similar
- Printer (if not using a Cricut)
- Cardboard and/or a Drop Cloth (Check out my awesome, plastic, Santa tablecloth!)
- Measuring Tape
- Armour Etch Cream

Plan Your Writing
First up, you need to figure out where you are going to put the text on your pan. Originally, I was putting them on the very bottom of the pan, so that they would show through to the top. However, I found that the text wasn’t really visible if the pan was dirty or still had contents. Lately, I’ve been putting it along the side, instead.

Measure the size of the area that you would like to cover with text, making sure to not include areas that have too much curve. If this is your first time doing this, I suggest that you start with some of your own things. I have etched Anne onto about a third of my pans at this point in time! I am glad I did, as I learned a few things in the process, such as how long it takes for the letters to show up well.
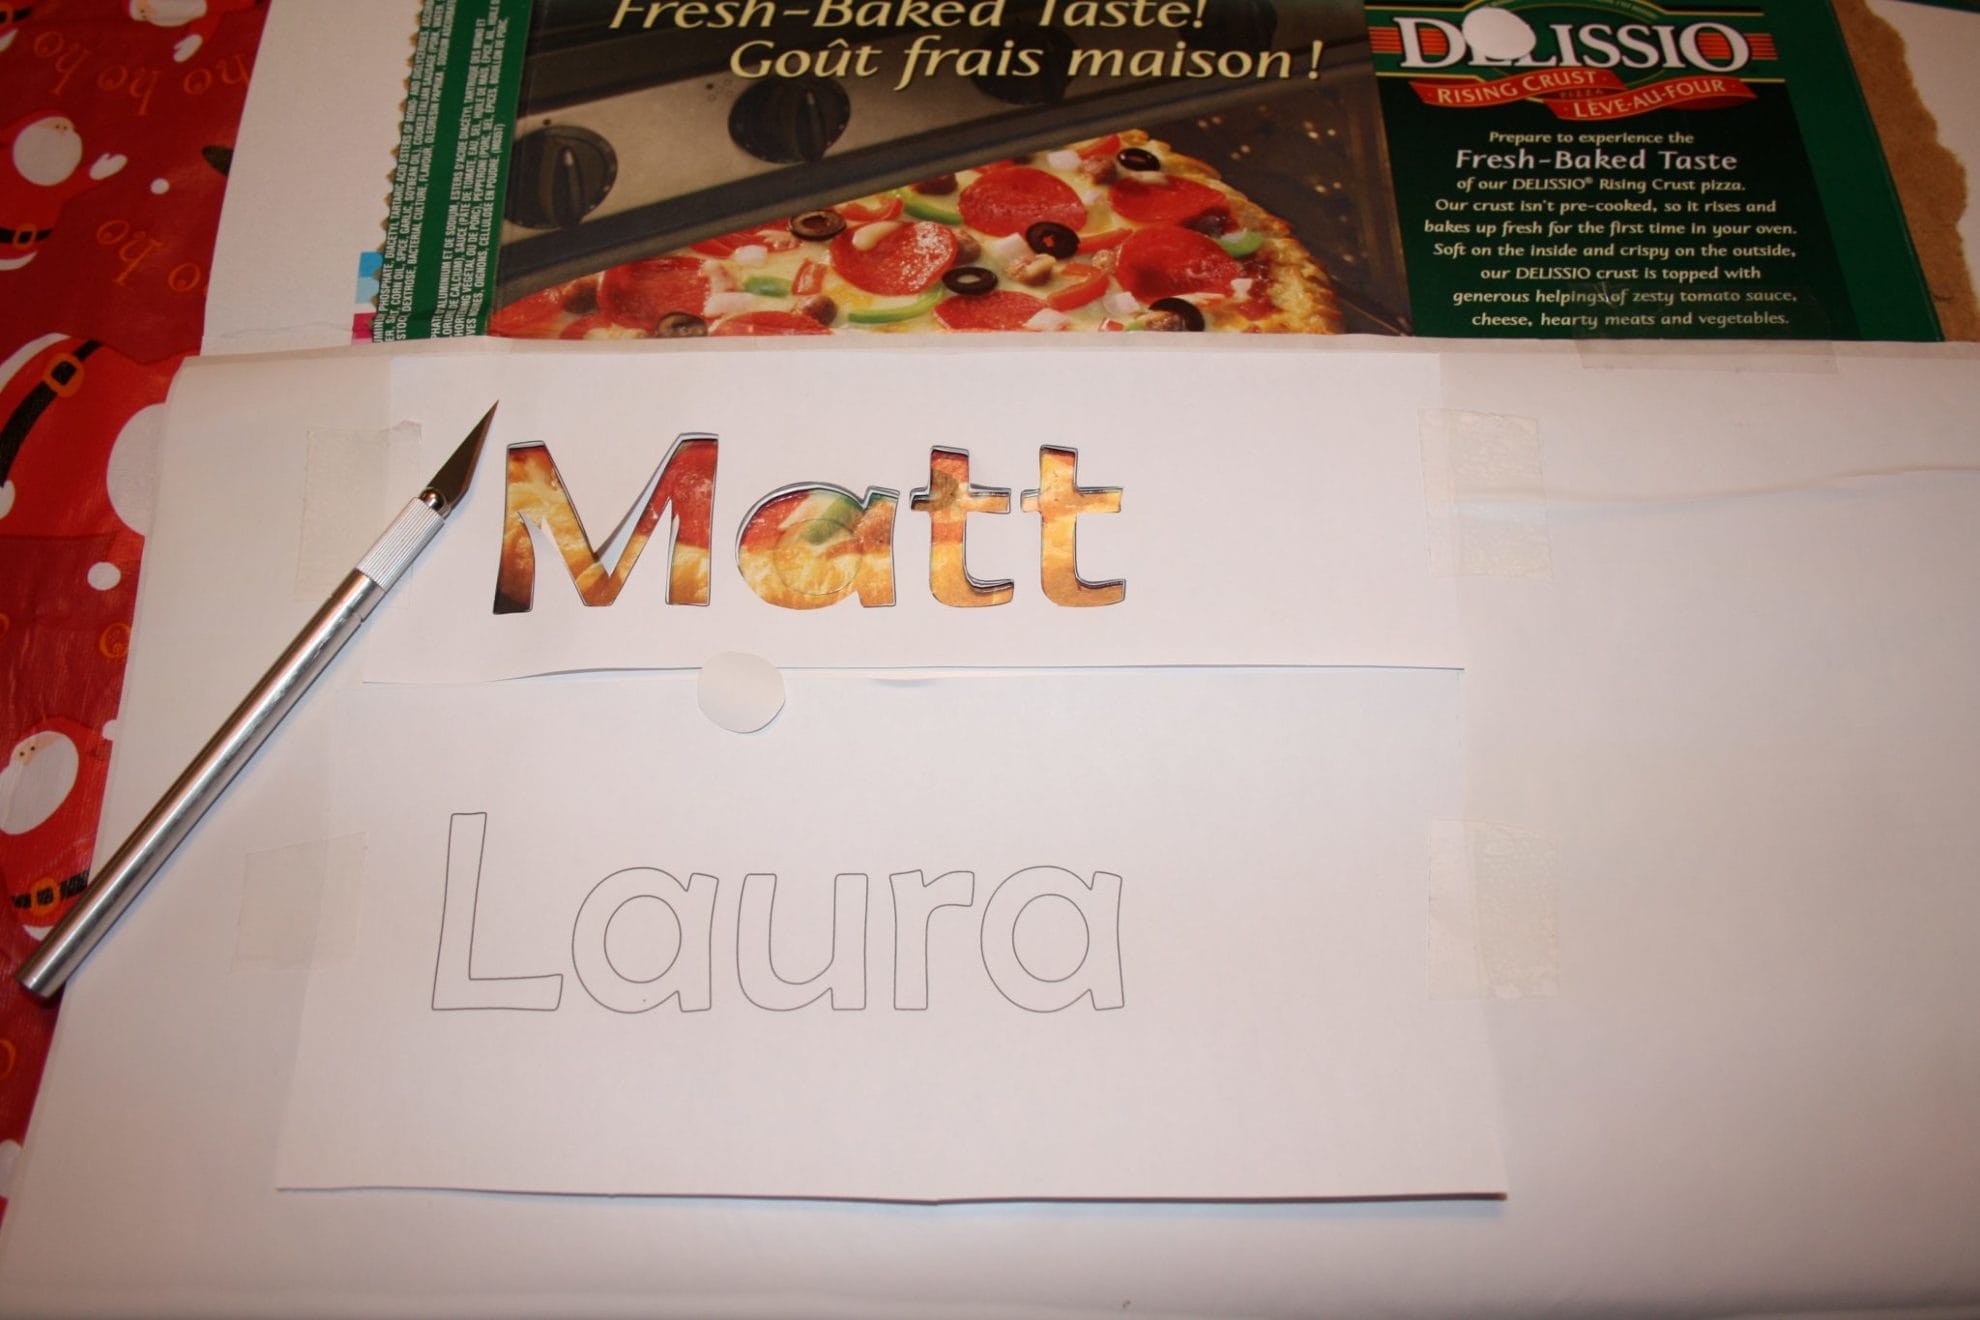
Create a Template
On your computer, make text the size that you would like. You can set exact sizes for your word art if you are using Microsoft Word or Publisher.
When designing your lettering, remember that you will have to position any central pieces by hand, such as the middle circle in an “o” or the top piece of a lower case “e.” Also ensure that you don’t have any extremely narrow sections, as they can be hard to line up straight once they are cut out.
Print the text out backwards (or mirror your image on the screen first), if you want to put it on the bottom of the pan, so that it is legible from the top. Most printers have a setting that allows you to do this, if you search the internet, you can probably find instructions. Alternatively, use a Cricut or a silhouette cameo if you have one, to directly cut out the letters you would like.
Cut Out the Stencil
Next, cut around the piece you just printed out, leaving an edge large enough to tape. Then cut out a piece of the contact paper you are using that is at least half an inch bigger on all sides than your text.
Working on cardboard or cutting mat, tape the piece of paper with the text on it to the contact paper. If you want to keep it from moving, tape it to the cardboard as well. Working carefully, use an craft knife to cut out the inside of the letters.
Try to keep the outside edges nice and smooth and do not cut too far, as that will be your exterior. You need to keep the centers of any letters with holes in them, such as “A” or “p” or “e.”
I use clear hockey tape, I find it pulls off easily. At the time, I probably used it because I couldn’t find scotch tape and I’m lazy like that; now, I use it on purpose. Once you have cut out all of your letters, detach the contact paper from the cardboard and figure out where you are going to place it on your pan.
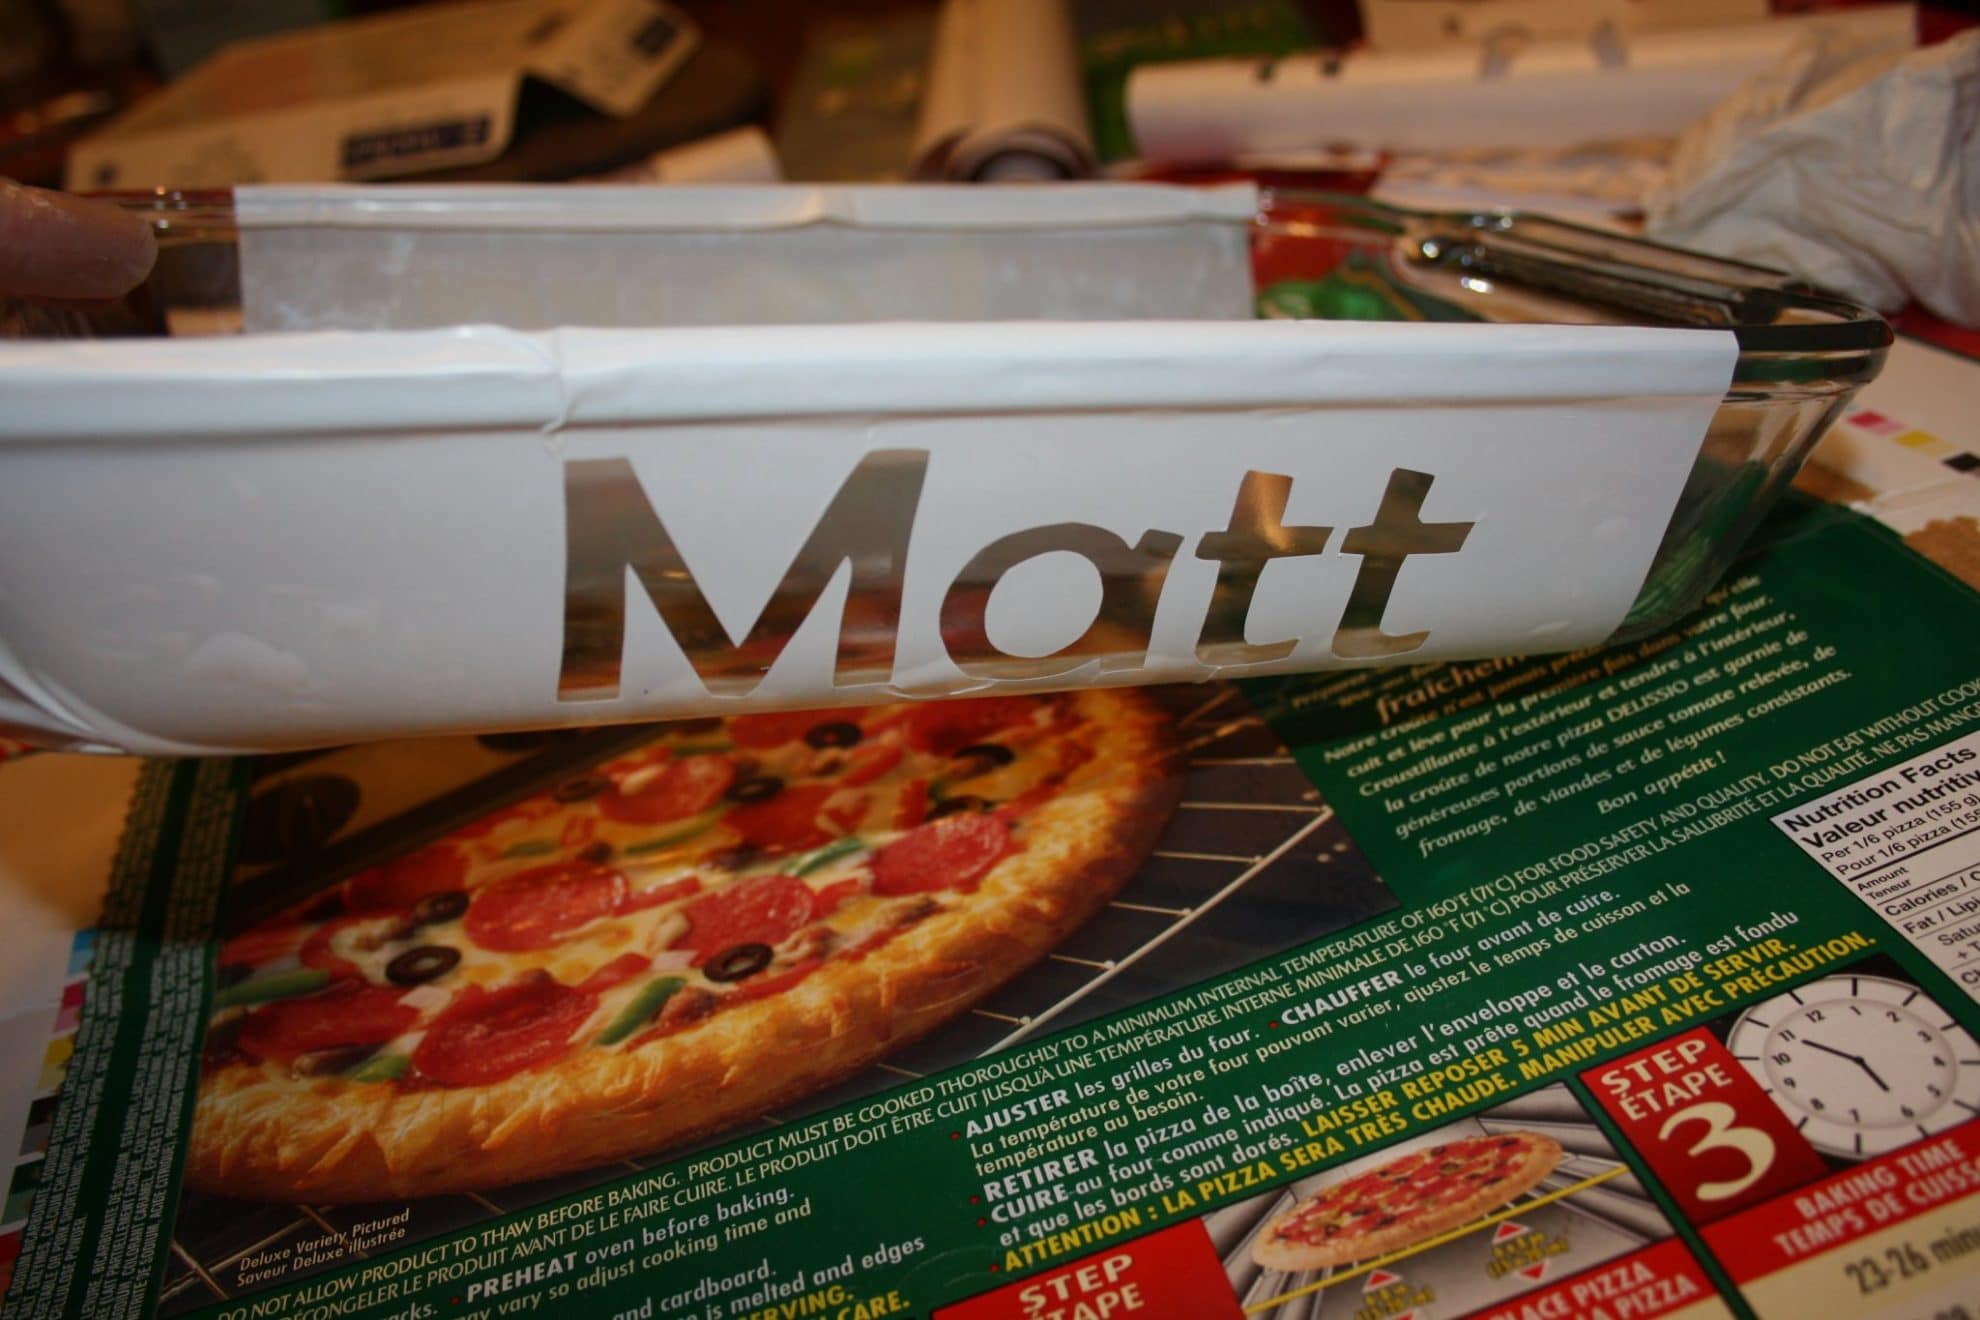
Prepare Your Pan and Stick on Your Template
You need to wash and thoroughly dry your glass pan before attaching the stencil. Also make sure that your hands are clean, so that you don’t leave any oils or other residue from your fingers.
Carefully peel off the back of the paper and stick it to the pan. Now rub it onto the glass very well, making sure there are no bubbles on the edges of the letters, otherwise the etching substance will get underneath and your letters won’t have crisp edges. Gravity is going to go to work once you have applied the Armour Etch, so ensure that you have protected any areas that might end up covered in Etch by using some extra vinyl or some extra hockey tape.
I will reiterate, this stuff is dangerous. It eats through glass, for goodness sake, imagine what it would do to your body! So now is a good time to put on your rubber gloves. Make sure your area is well ventilated and that you are going to be able to get from where you are to a usable sink fairly easily.
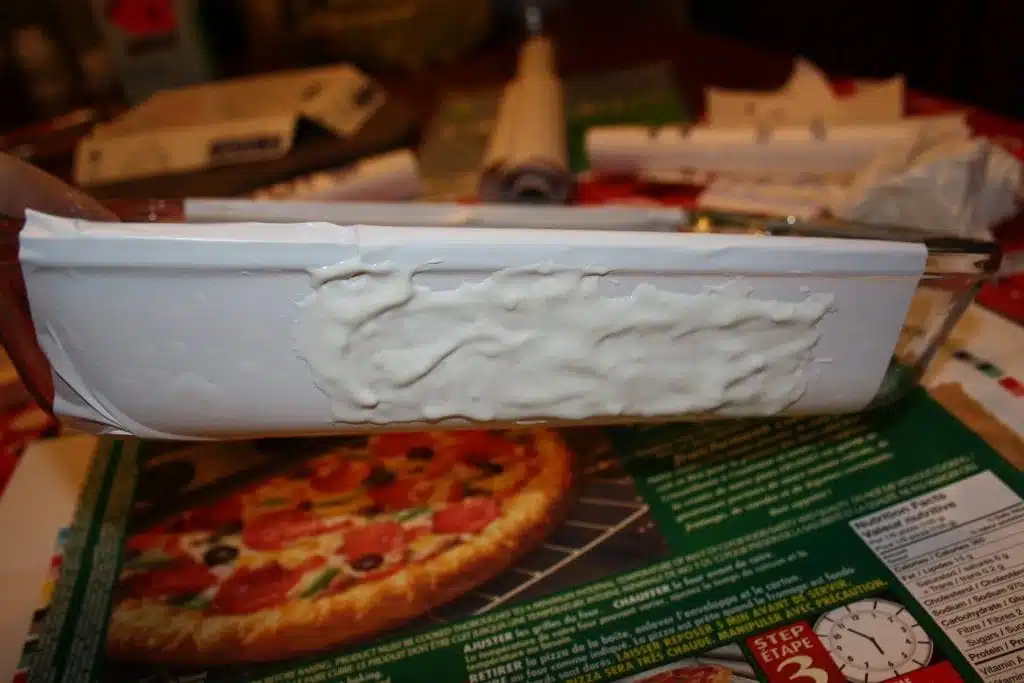
Apply Your Etching Cream
Now open your Armour Etch and apply a solid layer using your plastic spoon. Make sure that it is fairly evenly coating your surface and is thick. If it is too thin in some areas, the etching won’t be uniform. Once it is all on, start your timer. You will see warnings everywhere that you can’t use it on pyrex and to not use it for more than a few minutes.
Here’s where we deviate greatly from the directions. Leave that stuff on for at least 45 minutes. In the meantime, recap the bottle of Armour Etch and carefully remove your disposable gloves, without covering your hands in Armour Etch. I will usually wash my hands while the gloves are still on, using soap, and then take the gloves off without touching the outside.

Remove the Stencil and Clean Up
When the timer goes off, put gloves back on (a new pair, or the ones you had on before) and scrape the excess Armour Etch back into the container using your spoon. You really don’t need very much of it per project.
Once you have returned what you can to the bottle, put the lid back on, wipe the bottle down with some paper towel and store it in a ziplock bag, so that it doesn’t accidentally get on anything or on your skin. Then carry your project over to the sink (make sure there’s nothing in the sink, so you don’t cover things in the etch!).
Working fairly quickly under running water, wash off all of the excess Armour Etch, then add a bit of soap to get it nice and clean. While still at the sink with your gloves on, peel off your stencil. Wash the whole project again with soap now that the stencil is removed. Carefully remove your gloves again and dispose of them.
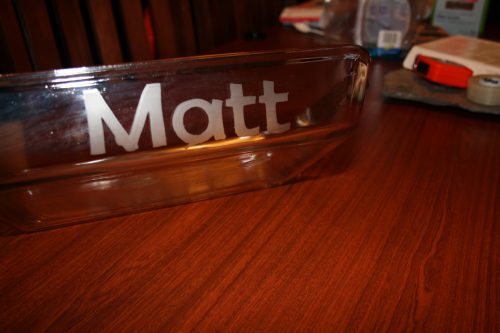
While you were washing, you might have been worried that the letters didn’t show up very well. Don’t worry, most of the time they are extremely difficult to see when wet! Now that your project is nice and clean, dry it off and sit back and admire it! You may or may not want to add in the original packaging.
Most people know how to use glass baking pans though :-) If you picked up one of the pans in a carrying case, it is easy to stuff the packaging back into the case and put the pan inside.
This one says Matt on one side and Laura on the other :-)

It may seem a little pedantic, but please heed the safety instructions included. They’re really not that difficult – ventilation, gloves, store in a ziplock bag, and they will keep you nice and safe for years to come :-)
That’s it! You’ve now created your very own personalized etched glass baking pan craft. Give it on its own as a great gift, or make something delicious and give it as a casserole instead!
Personalized Etched Backing Pan Craft

Here's how you can create your own custom etched baking pan using any name or message. No costly tools needed!
Materials
- Glass baking pan or another glass gift to etch
- Armour Etch Cream
- Disposable gloves
- Plastic spoon or paint brush
- Contact paper
- Clear tape
- Printer or Cricut (recommended), but you can also use a marker
- Craft or utility knife (if not using a Cricut)
- Cardboard and/or a Drop Clot
- Measuring tape or ruler
- Dish soap (for cleaning)
Instructions
- Plan what you want to write onto the glass.
- Measure the area where your writing will go, avoiding curves.
- Using a computer or circuit, create a template for your etching with your message. Make sure your message fits within the area you measured then print. Optional: if you don't have access to a printer or circuit, you can also manually draw your stencil using a marker.
- Cut around your stencil leaving enough edge to apply tape without covering the letters.
- Tape the paper onto a piece of contact paper, sticky side to the back.

- Lay the paper on a cutting mat or thick piece of cardboard to protect the surface underneath. Optional: tape the contact paper/stencil paper onto the mat or cardboard too to prevent slipping.
- Using a craft knife, cut out the letters carefully. This will be our stencil. Save any inside parts of letters, eg. the middle of an "a".
- Once your stencil is cut out, remove it from the cardboard or cutting mat and confirm the size and position will work.
- Clean your glass dish with dish soap and dry it thoroughly. Tip: wear gloves handling the clean dish; oil on your hands can affect the quality of your etching and tape adhesion in the next steps.
- Carefully peel the back off the contact paper and stick it on your pan where you want to etch.

- Rub it onto the pan. Tip: rub edges with a hard, flat tool like a pot scrubber, trowel, or credit card to get a smooth finish.
- Cover any areas that the etching cream may run with additional tape to protect your design.
- Wearing gloves, carefully apply etching cream covering the stencil completely.
- Remove gloves, wash hands, and set a timer for 45 minutes.
- Once timer goes off, reapply gloves and wash off etching cream with dish soap.
- Remove stencil carefully.
- Wash the pan again to remove any residue. Dry.

- Wrap and gift!


Notes
Etching cream is very powerful so be careful when using it.
Recommended Products
As an Amazon Associate and member of other affiliate programs, I earn from qualifying purchases.


