Disclosure of Material Connection: Some of the links in this post may be "affiliate links." This means if you click on the link and purchase an item, I will receive an affiliate commission. Disclosure in accordance with the Federal Trade Commission's 16 CFR, Part 255. This site is a participant in the Amazon Services LLC Associates Program, an affiliate advertising program designed to provide a means for sites to earn advertising fees by advertising and linking to Amazon.
Earlier this week I wrote about gift ideas for friends who are moving and talked about how I took burritos so that they wouldn’t need anything more than napkins in terms of dishes. They wanted to be able to pack up their dishes and cutlery!) Keep reading to discover this affordable burrito dinner for a crowd. This is totally one of those easy meals to take to families, too!
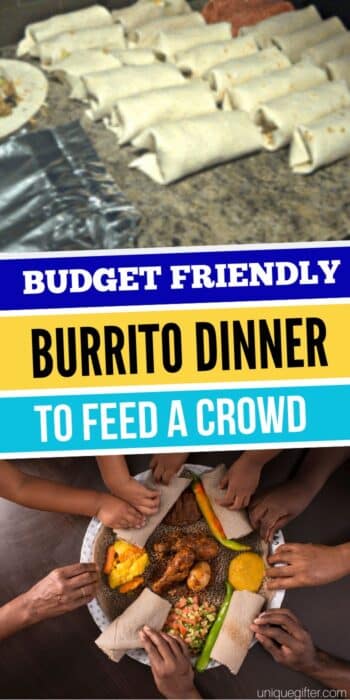
Easy Party Recipe: Affordable Burrito Dinner for a Crowd
Feeding nine adults’ dinner with enough for lunch leftovers can put quite a dent in the budget. In order to create a good meal for moving days and one that wouldn’t break the bank, I settled on chicken burritos. Of note, this still required a LOT of time on my part, but it made things super easy on their end.
My burritos contained rice, corn, kidney beans, chicken, onion, lettuce, cheese, sour cream, olives, diced peppers, and guacamole. I made approximately 22 burritos and estimate that the ingredients cost me $50, so they each cost about $ 2.25.
It is definitely possible to make them for less, too, especially if you live in the United States where food is cheaper (or in a major Canadian city, not in the boonies like me.) I also included a few things that were pricier, like olives and guacamole. Keep reading to discover this affordable burrito dinner for a crowd.
Here is the recipe (it’s really a method, not a recipe):
Big Batch of Budget Burrito Dinner
1. Make a big batch of rice. Whenever possible, pick whole wheat varieties of your grains, I used brown basmati rice. You can do this the day before. Make sure it is nice and moist.

2. Dice and cook an onion in a large dutch oven or skillet, in some olive oil. You can also add fresh garlic at this point. Cook the onion until it is translucent, then dump in lots and lots of taco seasoning. While the onions are cooking, dice your chicken.
3. Add the chicken to the onions and cook until just barely cooked through.
4. Add the rice to the chicken mixture, along with some extra water. You want to make sure that the rice is soft and doesn’t get dry and crunchy! You also don’t want it sticking to the bottom of the pot. Thoroughly mix these together, so the rice gets some nice color, and add more taco seasoning as necessary. At this point, you may want to add some diced tinned tomatoes. They will make everything nice and red, add vegetables and also reduce your costs.
5. Add in your “stretchers,” these and the rice are what keeps this dish affordable. Beans also add in more protein! I used kidney beans, but you could use pinto or black, or whatever you have on hand. Add a few cans and mix thoroughly. Watch your ratios and adjust to taste. You don’t want to end up with only two tiny cubes of chicken in each burrito, just make them vegetarian instead! Here are some other stretchers that add flavor and healthiness:
- frozen or tinned corn
- cooked lentils
- tofu
- shredded carrot
6. While the main filling is heating through on the stove, bringing all the flavors together, dice the rest of your toppings and make your guacamole. The guacamole can be a pricey part, so feel free to skip it. Toppings you could dice and slice:
- lettuce
- tomatoes
- pepper
- hot peppers or tinned hot peppers
- avocados
- grate cheese, if you didn’t buy it pre-grated
7. Don’t forget to stir your filling once and awhile. Add more water if it seems to be getting too dry. Do a final check on the flavor and spices.
8. Set up an assembly station. Line up bowls of filling and a trivet around a large work area. You may want to add more ingredients at this point:
- sliced olives (semi-pricey)
- sour cream
- hot sauce (optional!!!)
- refried beans (very affordable)
9. Microwave the wraps for a few seconds, to make them more pliable. If these are for guests, let them assemble their own. If not then lay the wraps out across your counter or table and get crackin’.
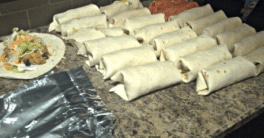
10. Start assembling! Do a batch of toppings at a time, then roll them up and line them up on the counter (as in the photograph). If you are making different types, consider color coding them with different wraps. In this photograph, the ones in red tomato wraps are for my spouse, who can’t have cow dairy or beans. When finished, do another batch until you have as many as you need, or you are out of fillings.
11. Rip a bunch of tinfoil into lengths that are about 3″ longer than the rolled-up wraps. Place a wrap on it, roll it up and pinch the ends in, so that it looks kind of like a Christmas cracker. You can use stickers or masking tape to make different types identifiable if you’d like.
12. You’re all done! It probably took a while, but the results will be delicious. They can be reheated in a panini press, toaster oven or oven, and delivered in a disposable bag with napkins. There’s nothing to clean up and nothing to return. Tell your recipients to peel the tinfoil like a banana in order to eat them.
I recommend serving these with tortilla chips and salsa (if you’re not feeling terribly healthy) or with some sliced veggies (possibly with dip). Enjoy! Beginner cook? You might need these beginner cook tips.
Burrito Dinner for a Crowd
This easy, budget friendly burrito dinner recipe is a great way to feed a crowd at a party or event. You can even make it ahead of time!
Ingredients
- 1 tbsp Oil (for frying)
- 1 large onion, diced
- 3-6 cloves fresh garlic, diced
- Taco seasoning (to taste)
- 3lbs chicken breasts, diced
- 6 cups cooked rice (Mexican, basmati, white rice, brown rice - your choice)
- 32 oz can diced tomatoes
- 1-2 cans beans (kidney, pinto, black - your choice)
- 1 container of sour cream
- 1-2 cans refried beans
- 20 large tortilla shells
- 1-2 cups grated cheese
- Your choice of toppings and sides (lettuce, tomatoes, pepper, jalapenos, avocados, guacamole, salsa, extra cheese)
- Optional fillers: frozen or canned corn, cooked lentils, tofu, shredded carrot.
Instructions
- Pre cook your rice and let cool.
- Heat oil in a large skillet or cast iron pot then add diced onion. Fry until translucent in colour.
- Add garlic, and fry for 30-60 seconds, until browned slightly.
- Add diced chicken.
- Fry chicken just until cooked through.
- Add 1/4 cup of water and season with taco seasoning, to taste.
- Add rice to the chicken mixture and stir together. You may need to add more water to ensure it doesn't dry out.
- Check taste and add more seasoning, if needed.
- Continue to fry until rice is reheated and slightly browned. Add more water, as needed, so it doesn't dry out.
- Once rice is done mix in canned tomatoes and beans, along with optional fillers of your choice.
- Allow mixture to warm up, stirring occasionally.
- Meanwhile, prepare and set out filling and topping ingredients.
- Once the mixture is heated through remove from heat.
- Warm tortillas in the microwave so they're easier to work with.
- Assemble your tortillas: include your rice and chicken filling mixture, sour cream, refried beans, and cheese in each one.
- Wrap tortillas in foil.
- Serve immediately or put in the fridge. Chilled tortillas can be reheated in the oven. Serve with optional toppings of your choice.
Notes
- Recipe amounts are approximate and will depend on how many filling stretchers you use and how much you fill the tortillas.
- Recipe can be easily multiplied to feed even bigger groups.
Recommended Products
As an Amazon Associate and member of other affiliate programs, I earn from qualifying purchases.

What is your affordable dinner for a crowd that you suggest? Are you looking forward to this affordable burrito dinner for a crowd?