Disclosure of Material Connection: Some of the links in this post may be "affiliate links." This means if you click on the link and purchase an item, I will receive an affiliate commission. Disclosure in accordance with the Federal Trade Commission's 16 CFR, Part 255. This site is a participant in the Amazon Services LLC Associates Program, an affiliate advertising program designed to provide a means for sites to earn advertising fees by advertising and linking to Amazon.
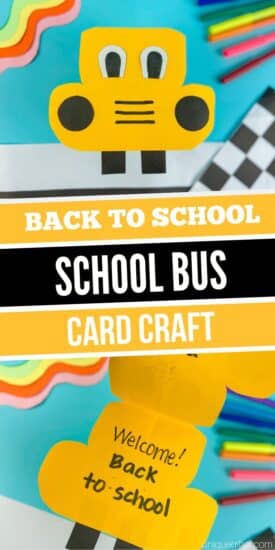
Back to school time is almost here (Sorry Kids)! Time to start planning those lunches and some fun crafts to help ease the kids into school time! This DIY School bus card craft tutorial is the perfect afternoon craft to do with your kids or for your classroom to help welcome back your students! It’s simple yet super cute and every kid will have a blast creating it. Check out how to create this adorable School bus card craft below!
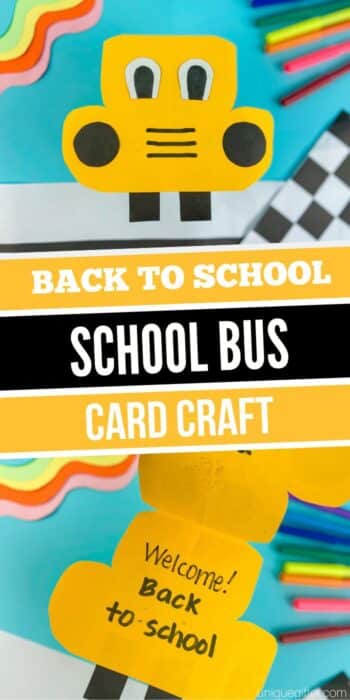
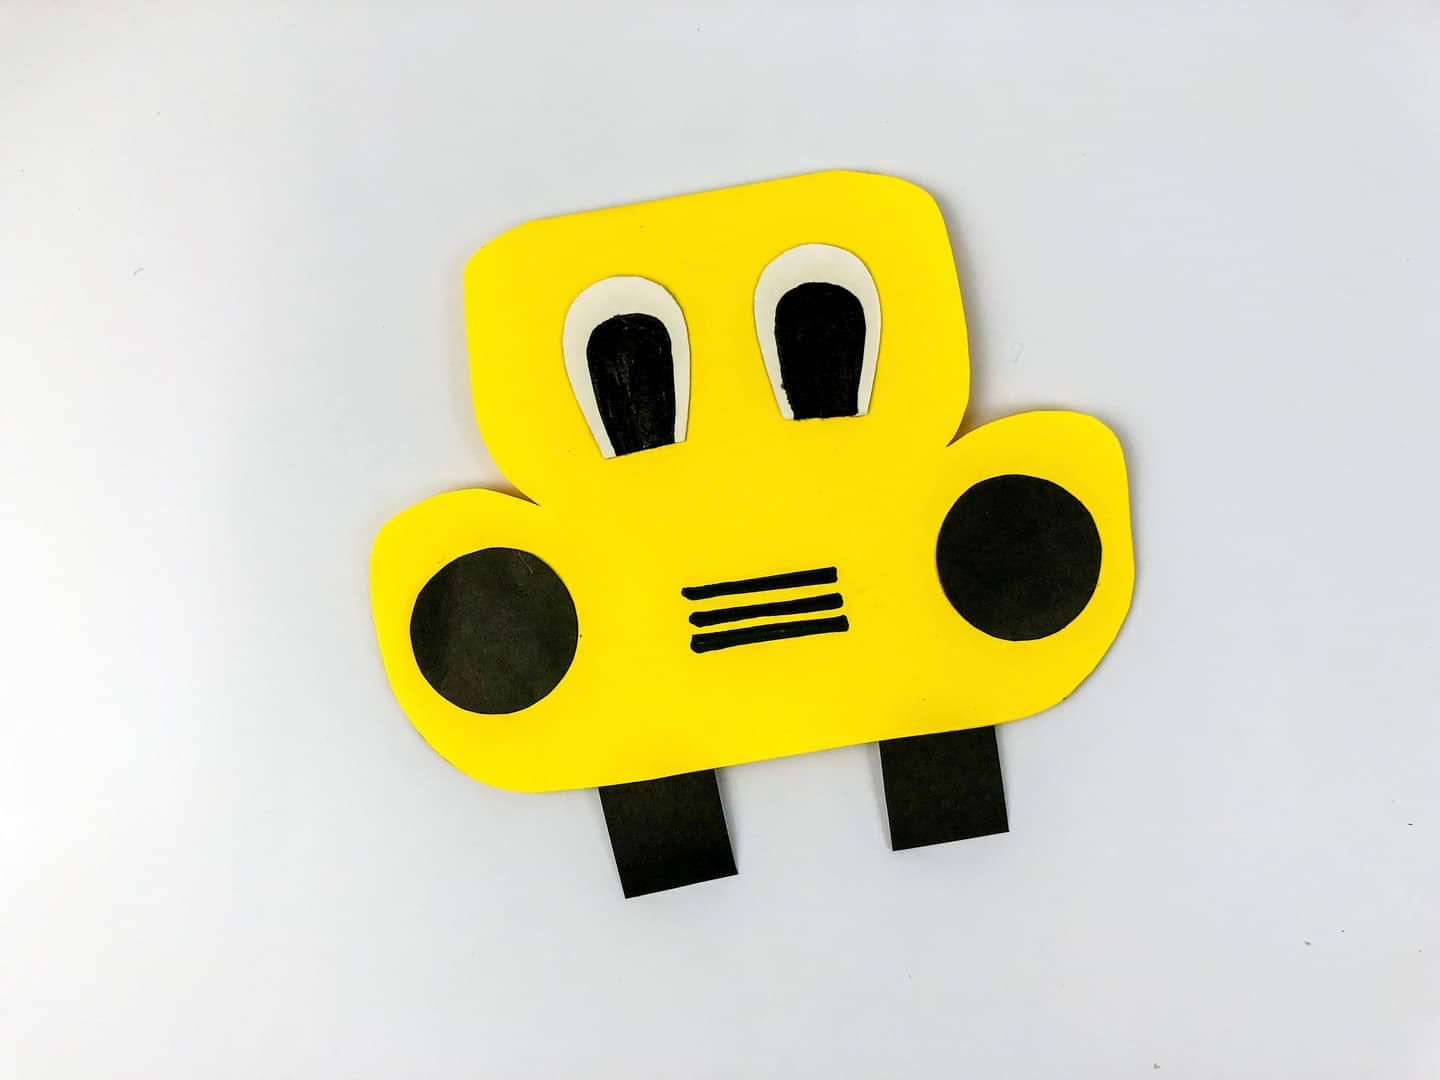
Fun and Easy DIY School Bus Card Craft
We love a good back to school craft! Our DIY School bus card is fun and easy to make and the perfect way to celebrate the start of the school year. Grab some paper, scissors, markers, and glue and you are ready to get crafting! The best crafts are not only easy to throw together but are super affordable! Perfect to do at home or on a larger scale in the classroom.
What to do With Your School Bus Card
This craft is a fun one to do with kids, they can use it as a card to give to their teacher, school bus driver, or even to just display around home. Another great idea is for teachers to make ahead of time for their students as welcome back idea OR have your students make it and place their names on it.
They can hang them in the windows at school, bulletin board, or have it on their desks or tables. There are endless possibilities of who and what you can use these cards for! Just remember you don’t have to put “welcome back” inside you can put whatever you wish!

Creating your School Bus Card
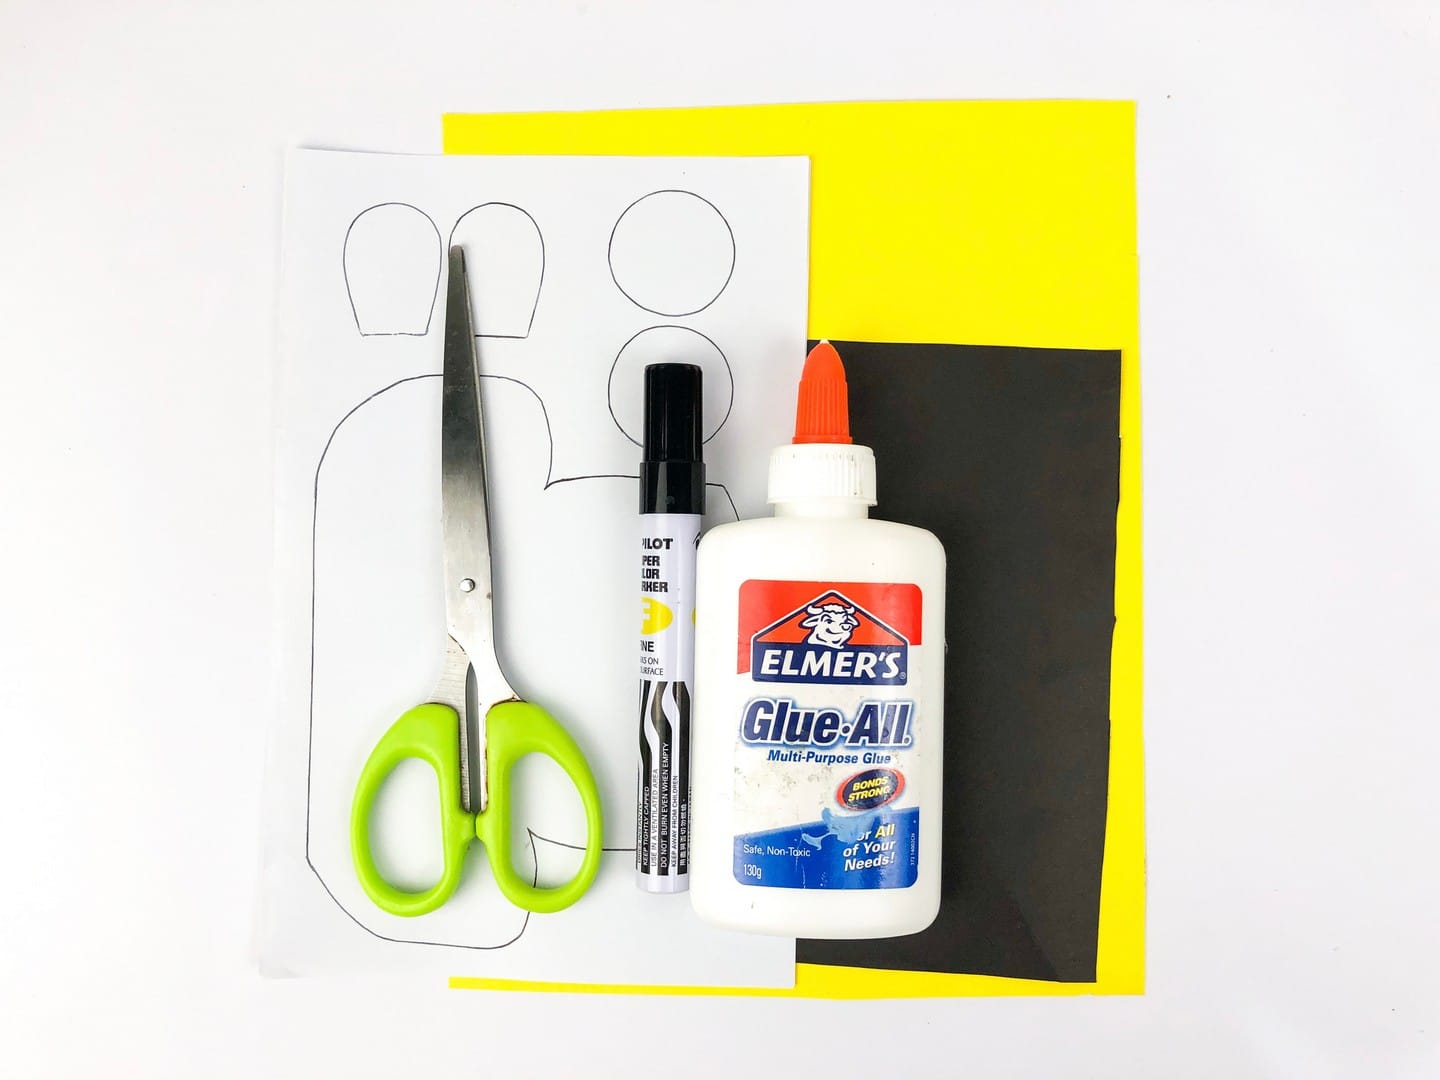
Supplies Needs
- Yellow Paper
- Black Paper
- White Paper
- Pencil
- Black Permanent Marker
- White Liquid Glue (or glue stick)
- Scissors
Instructions:
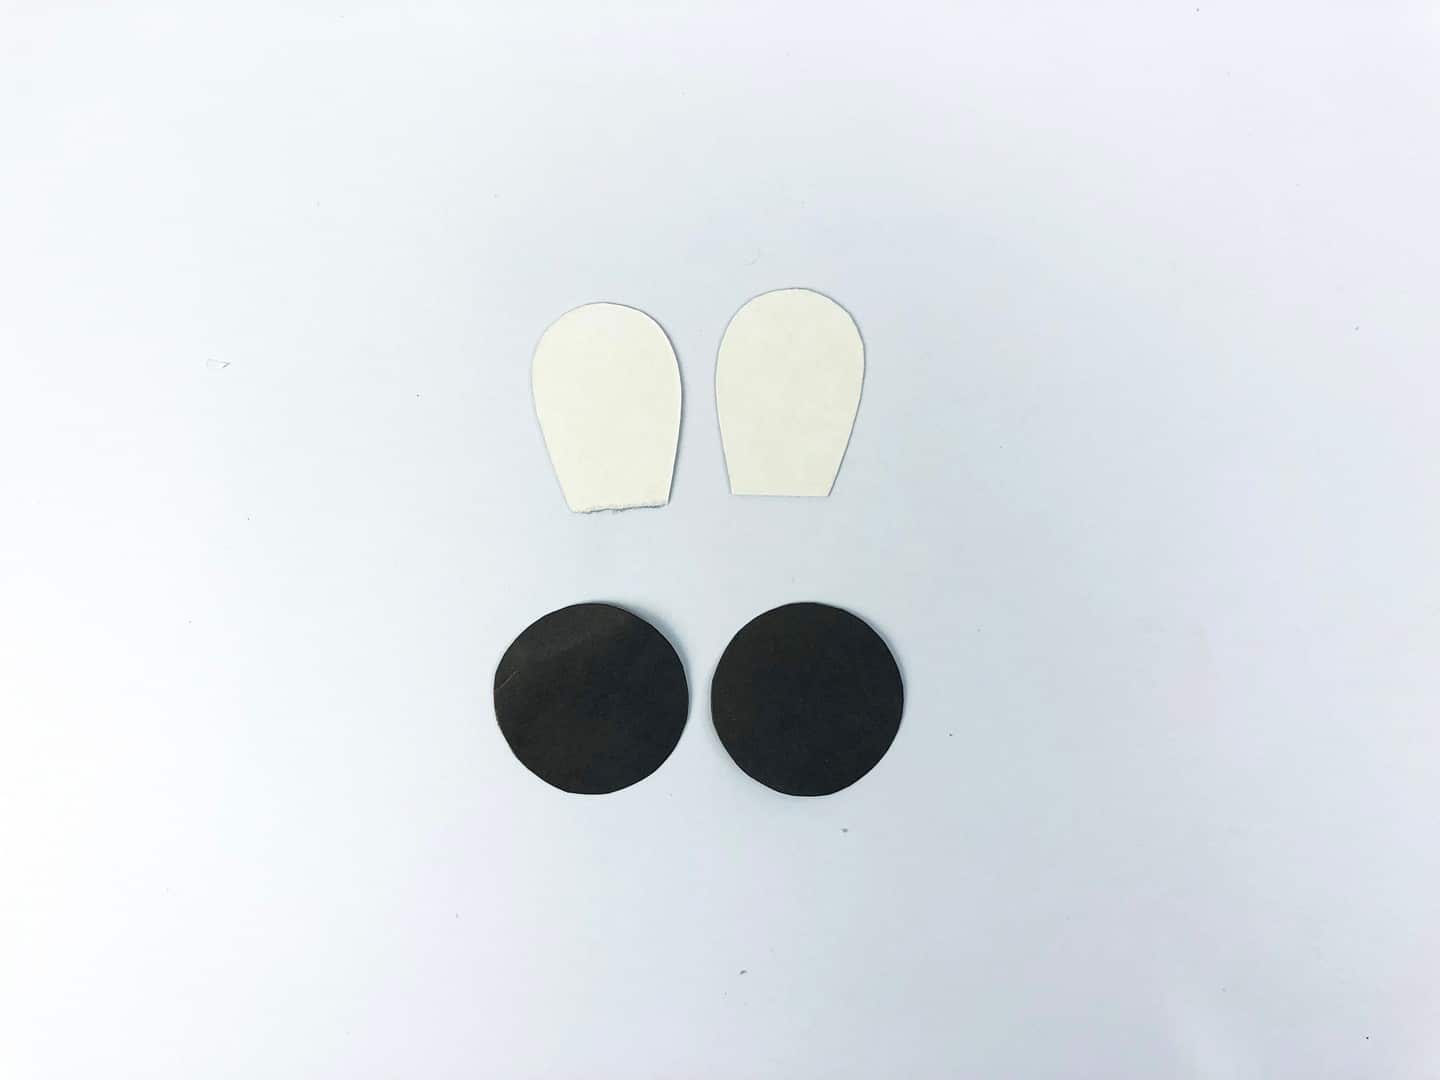
- Take your white paper and trace your bus outline, eyes, and headlights. These will act as your tracers for your bus.

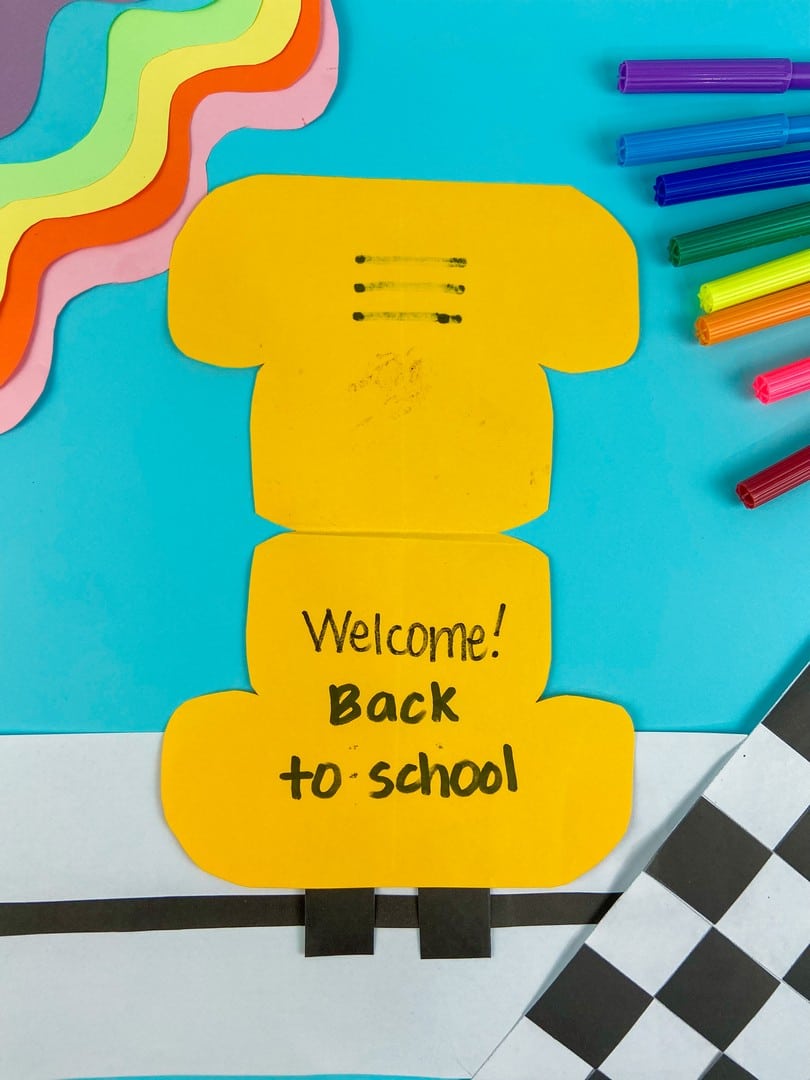
- Take your yellow paper and fold it in half.

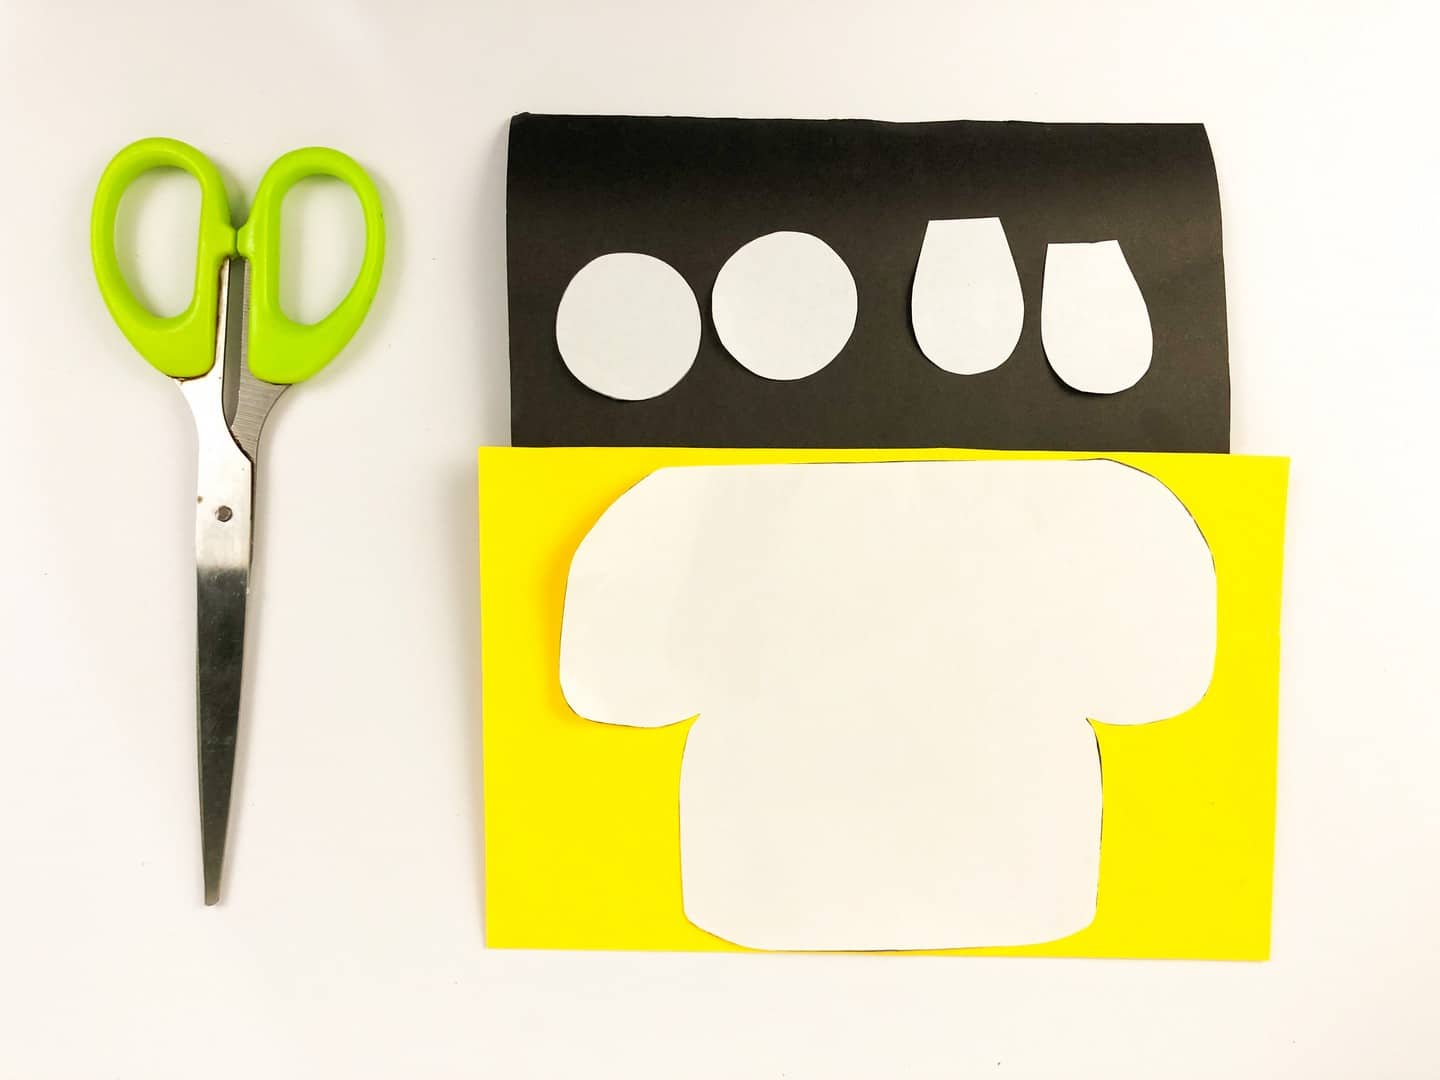
- Cut out your white tracers and place the circles and eye shapes on your black paper. Take your bus shape and place it on your yellow paper. Ensure the top of the bus is where its folded. If kids are doing this we suggest as adult help.
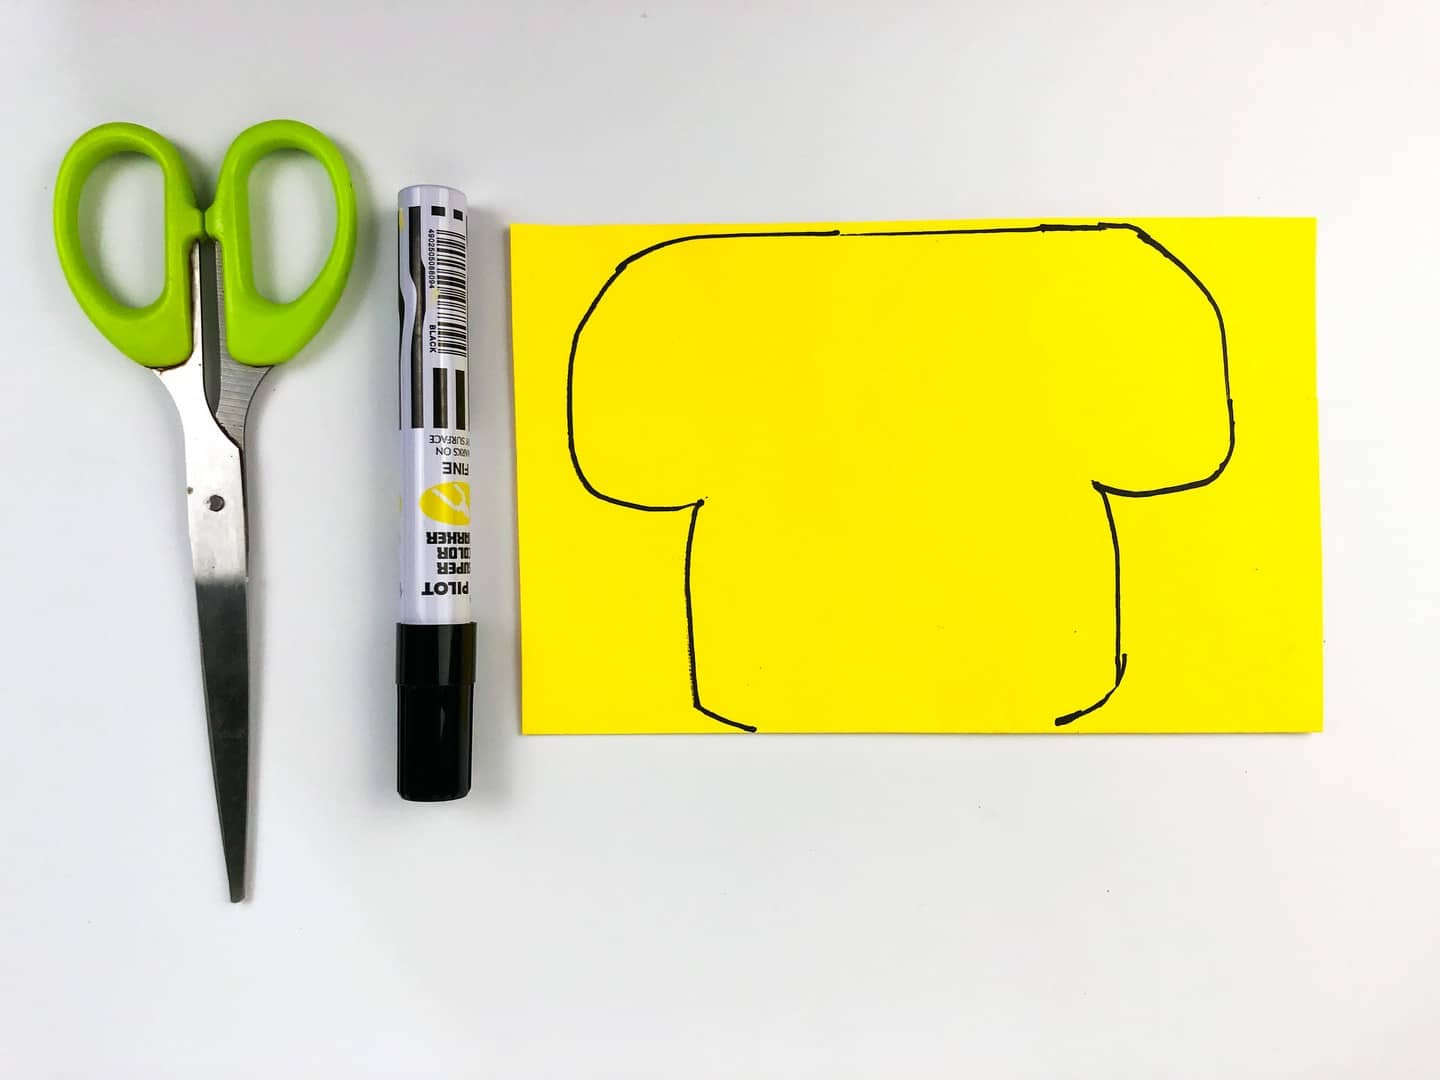
- Get your black permanent marker and trace around your bus shaped tracer (you may also use a pencil if you prefer)
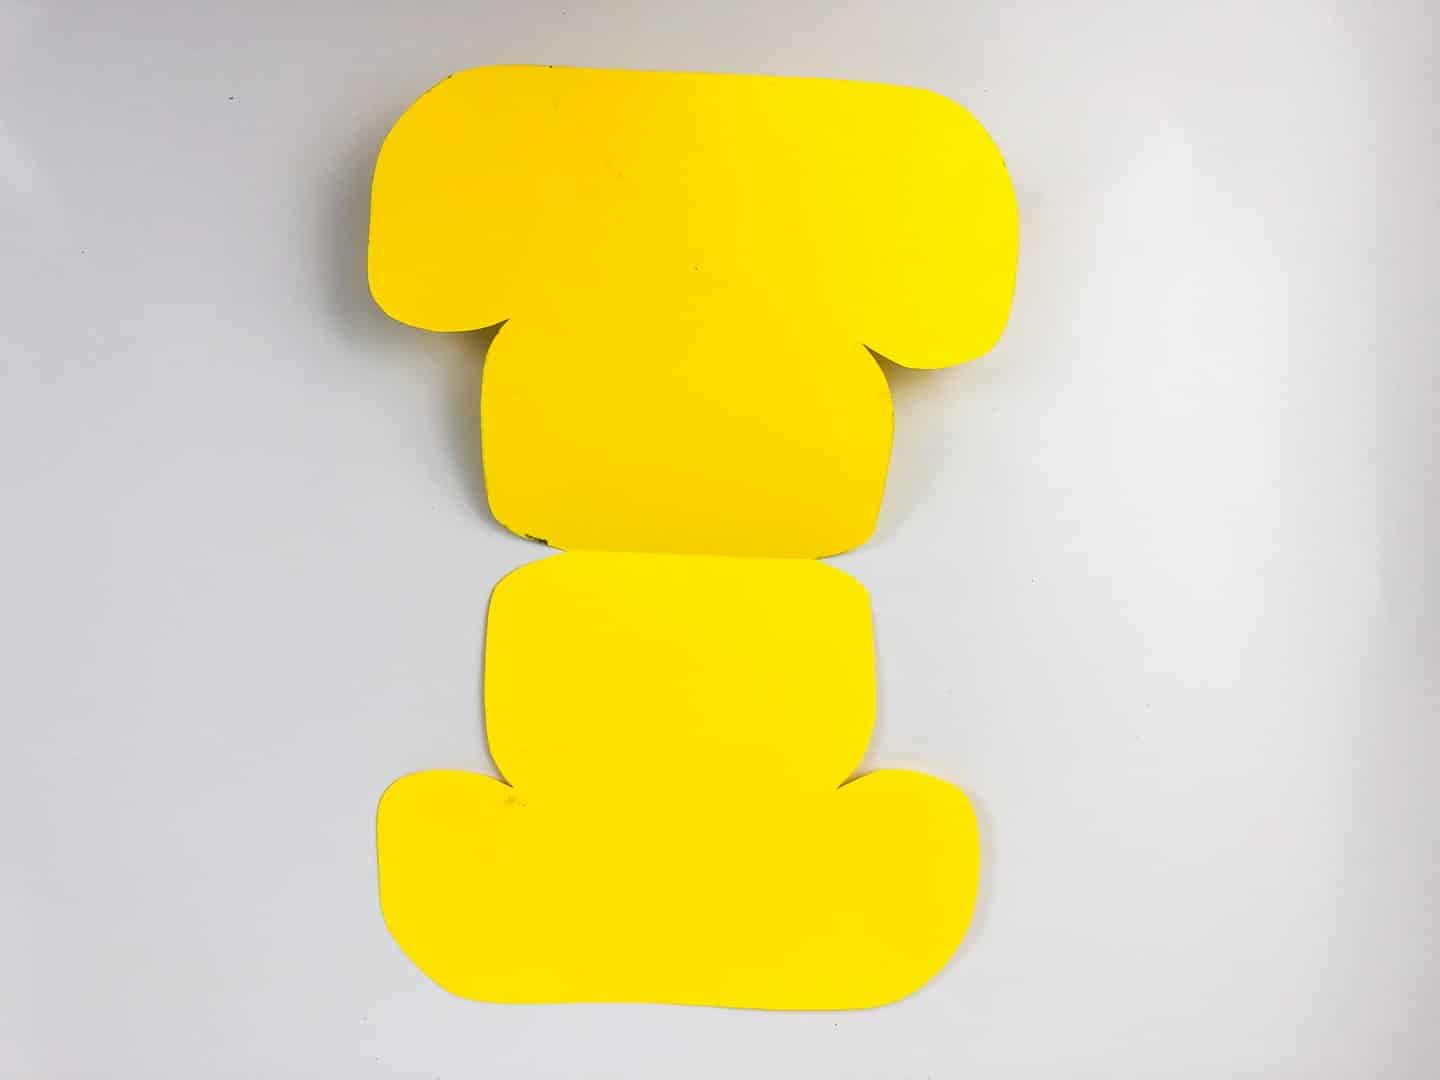
- Cut out your bus body card, ensuring you can open it up the correct way.
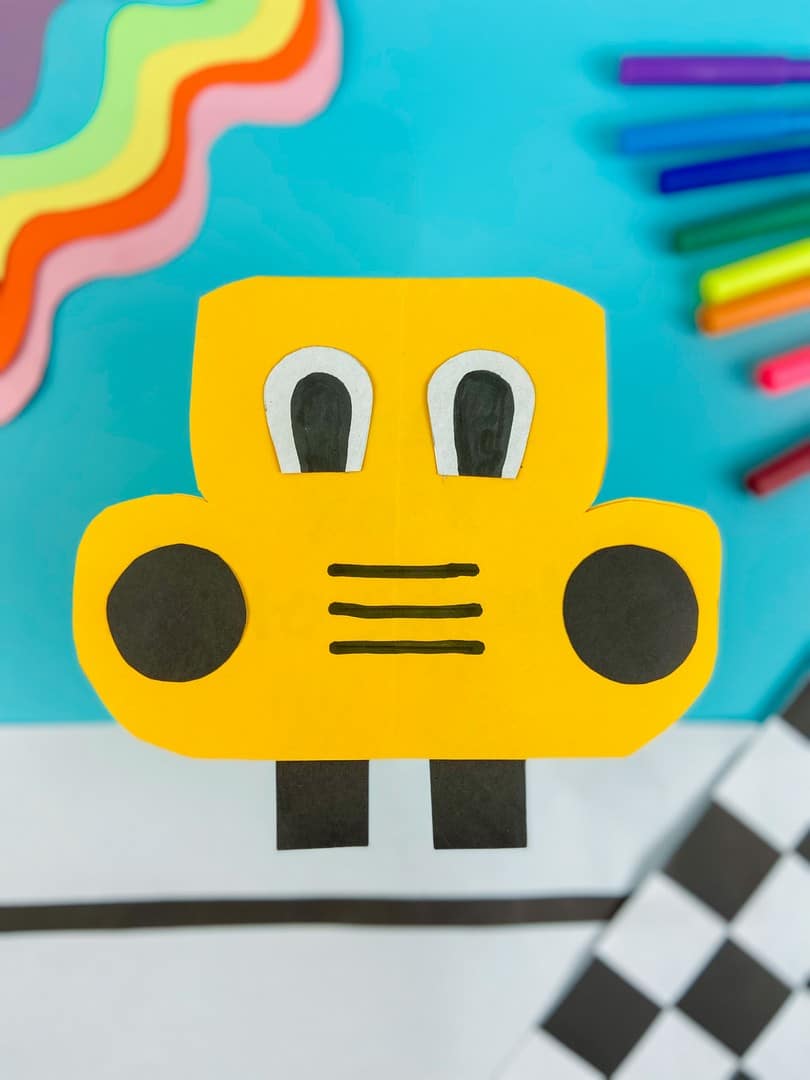
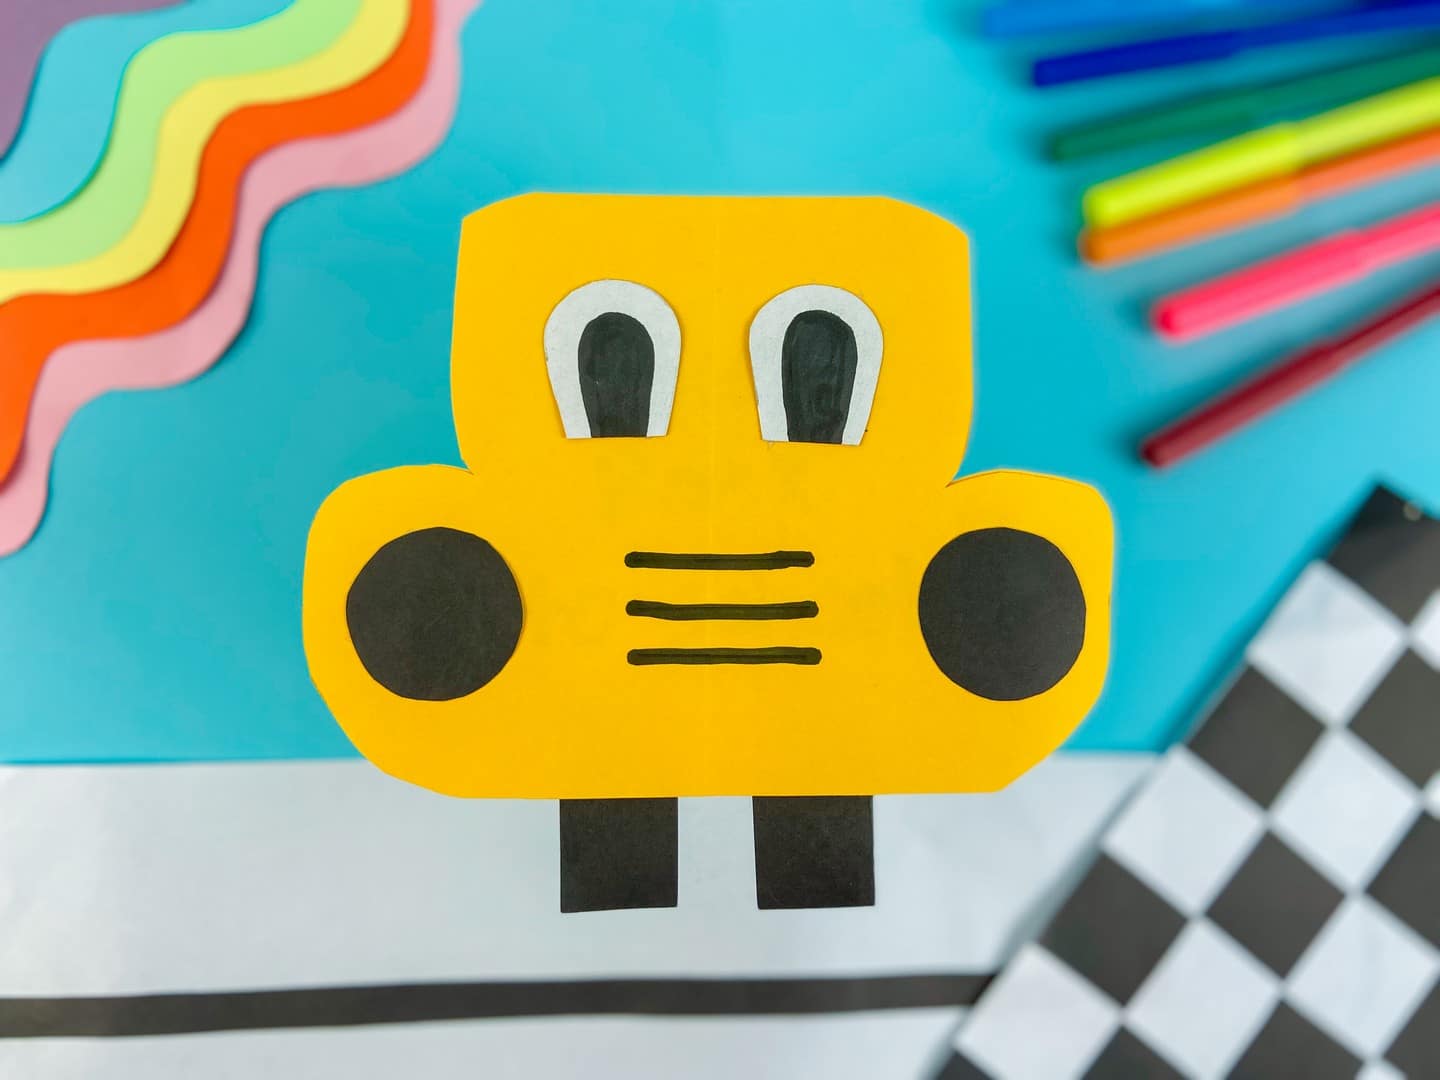
- Next, cut out your eyes and circles that will be your headlights.
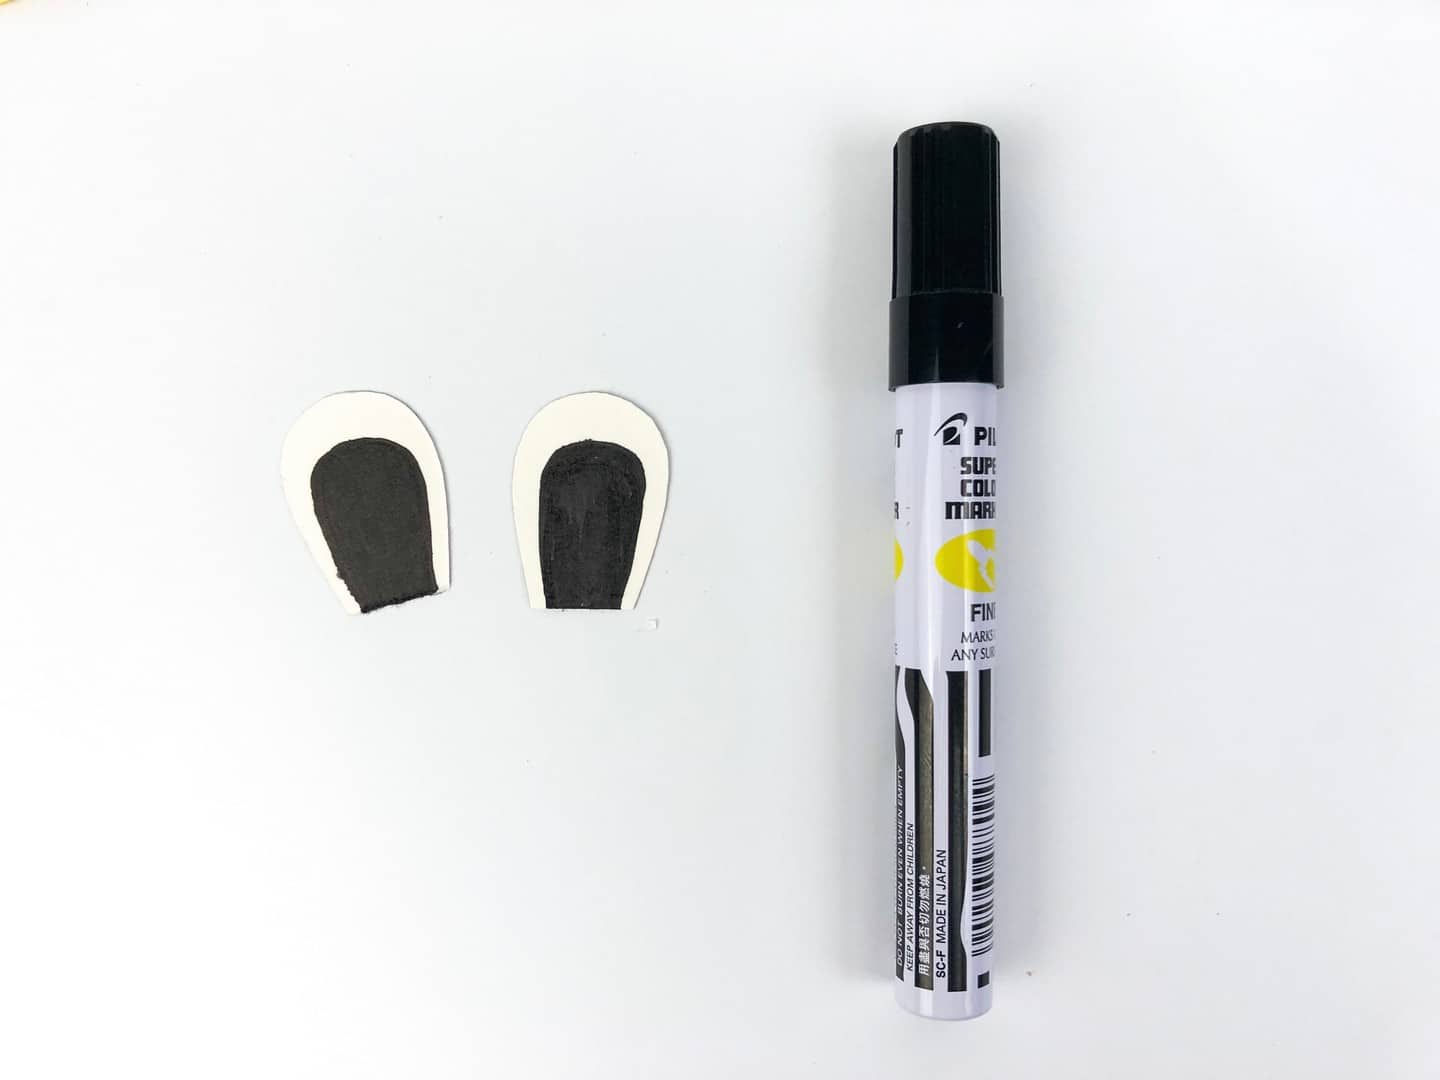
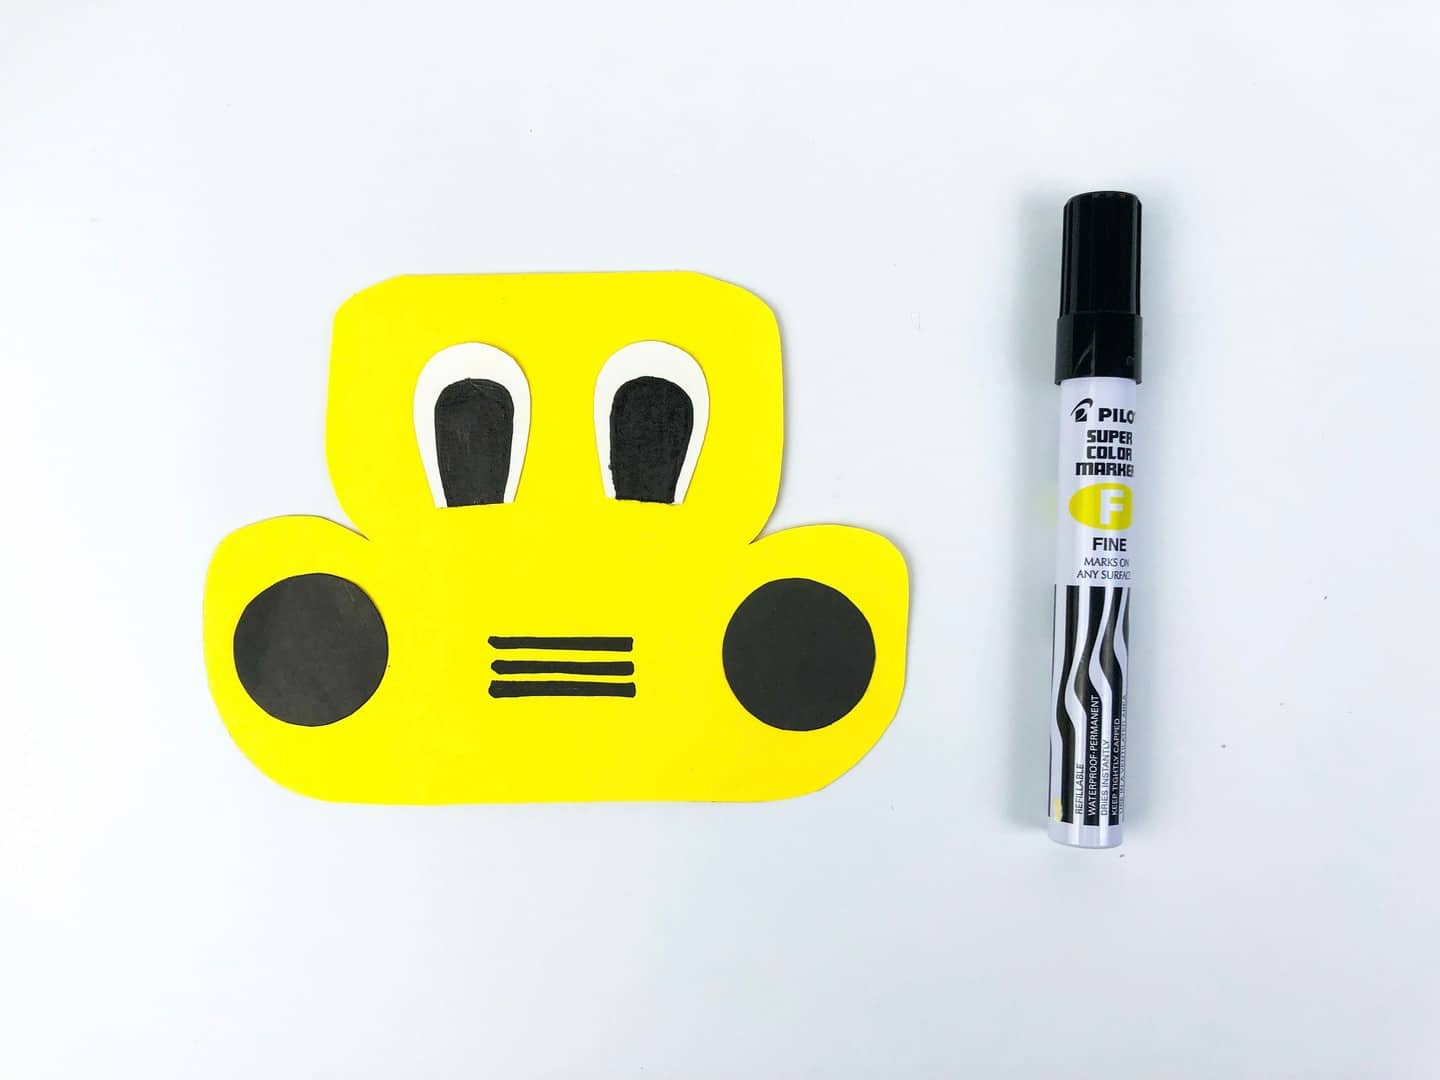
- Take your permanent marker and draw pupils on your eye shapes.
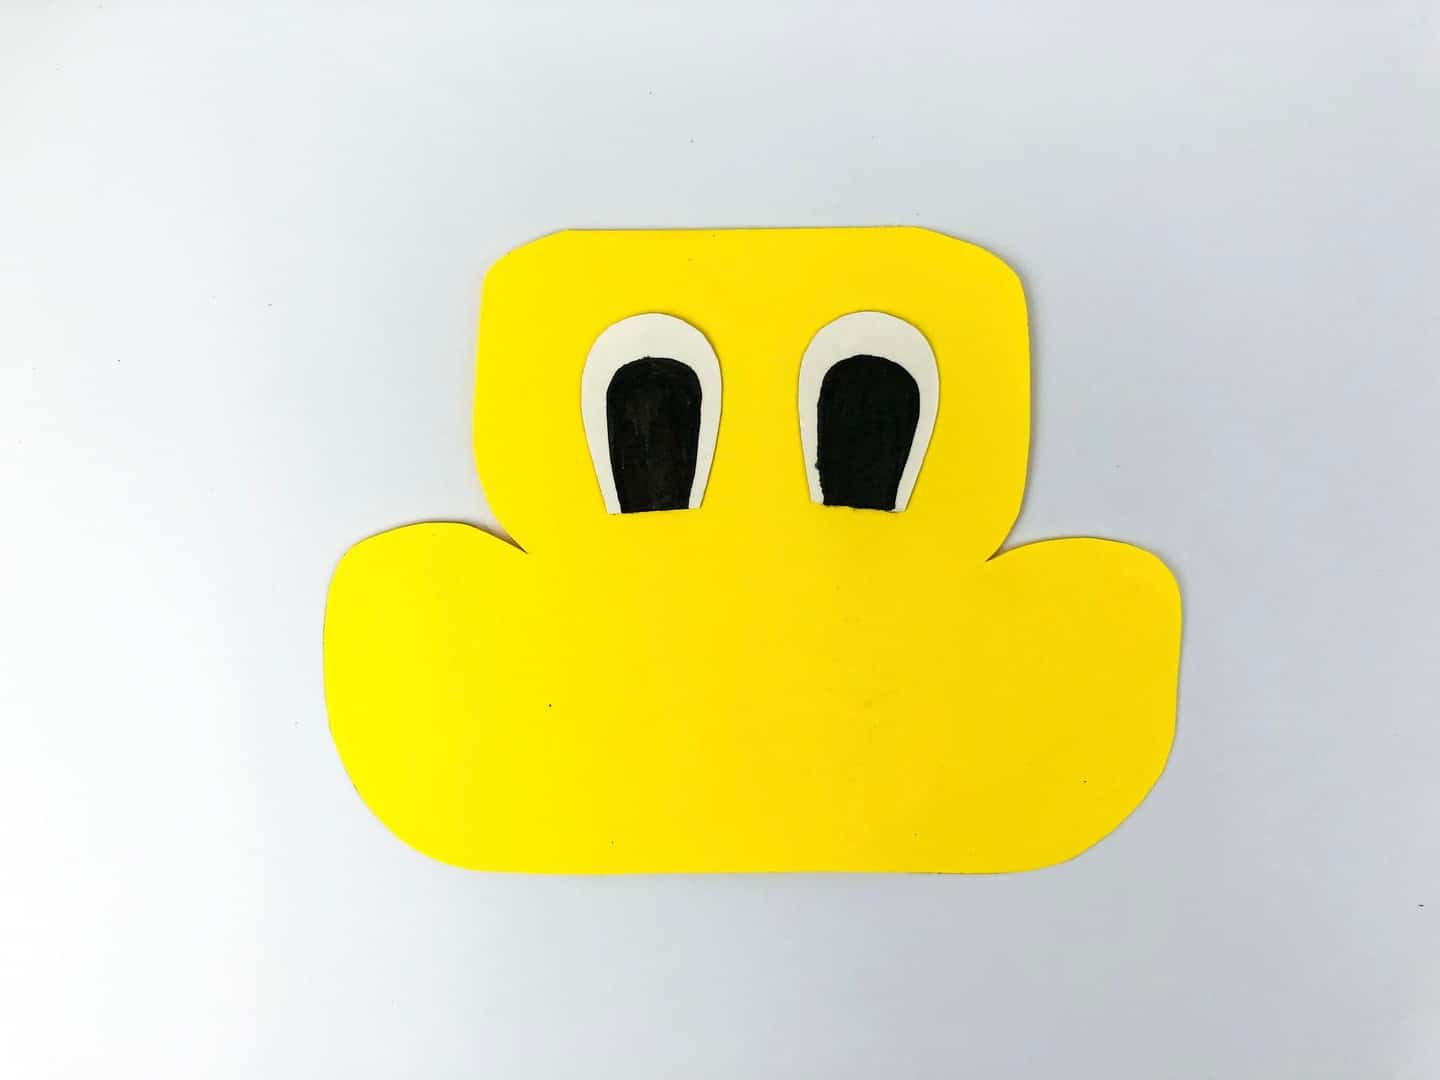
- Place your eyes on your bus body and glue them down (Use liquid or glue stick).
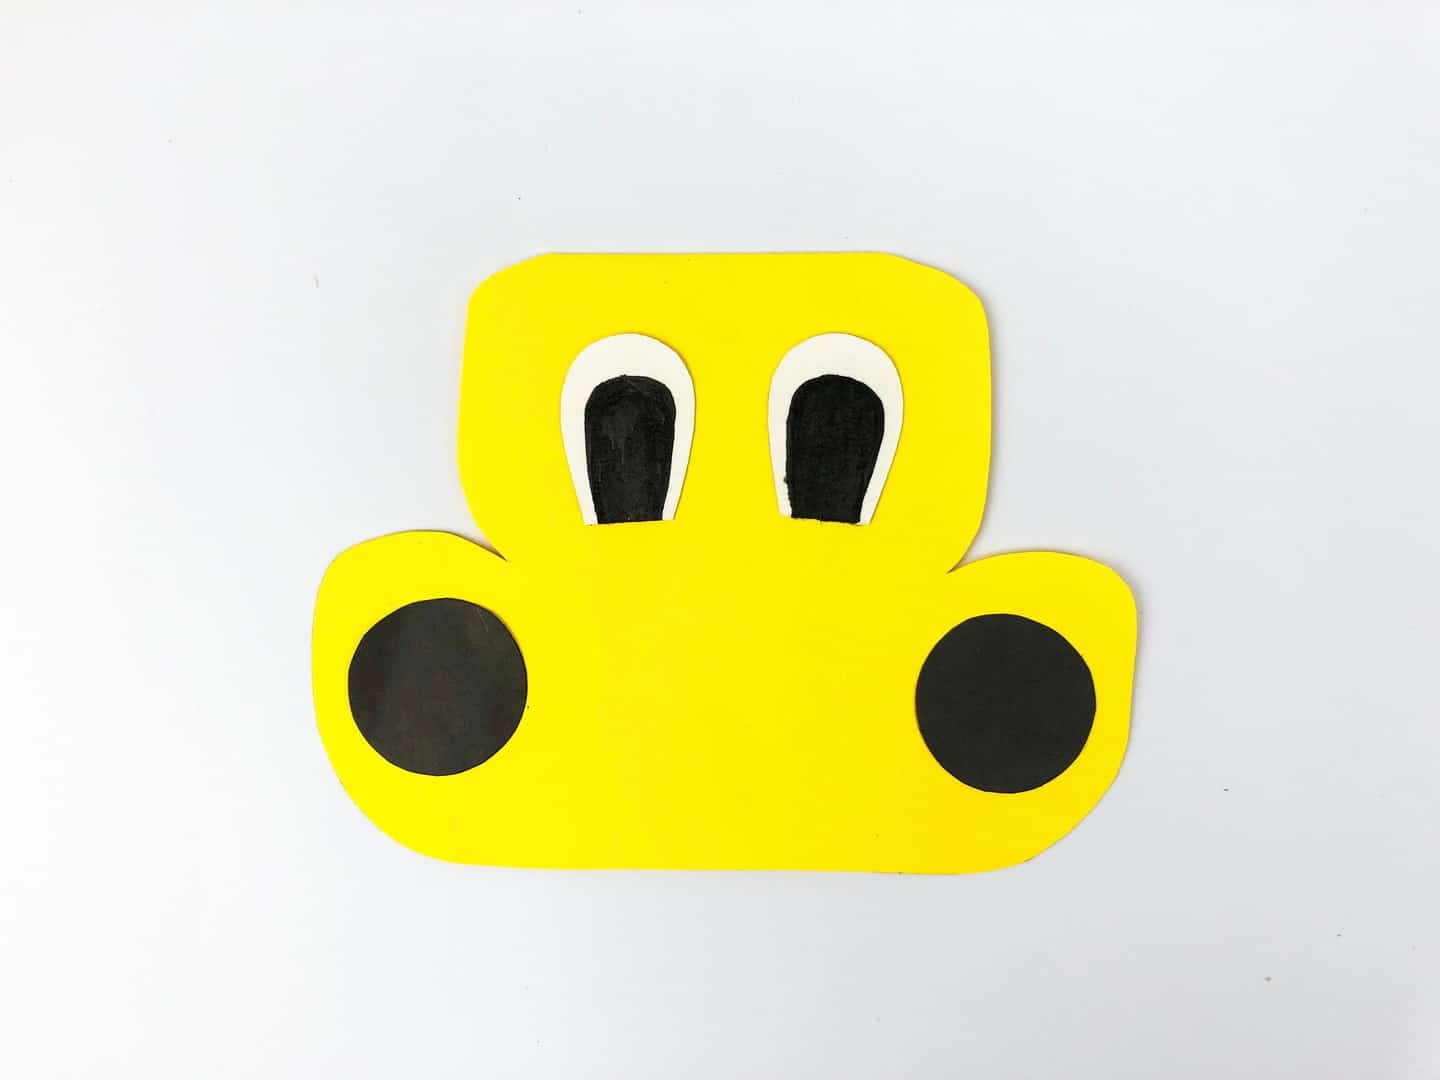
- Place your round circles on your bus body to act as headlights.
- Take your permanent marker and draw three straight lines to act as the front grill.
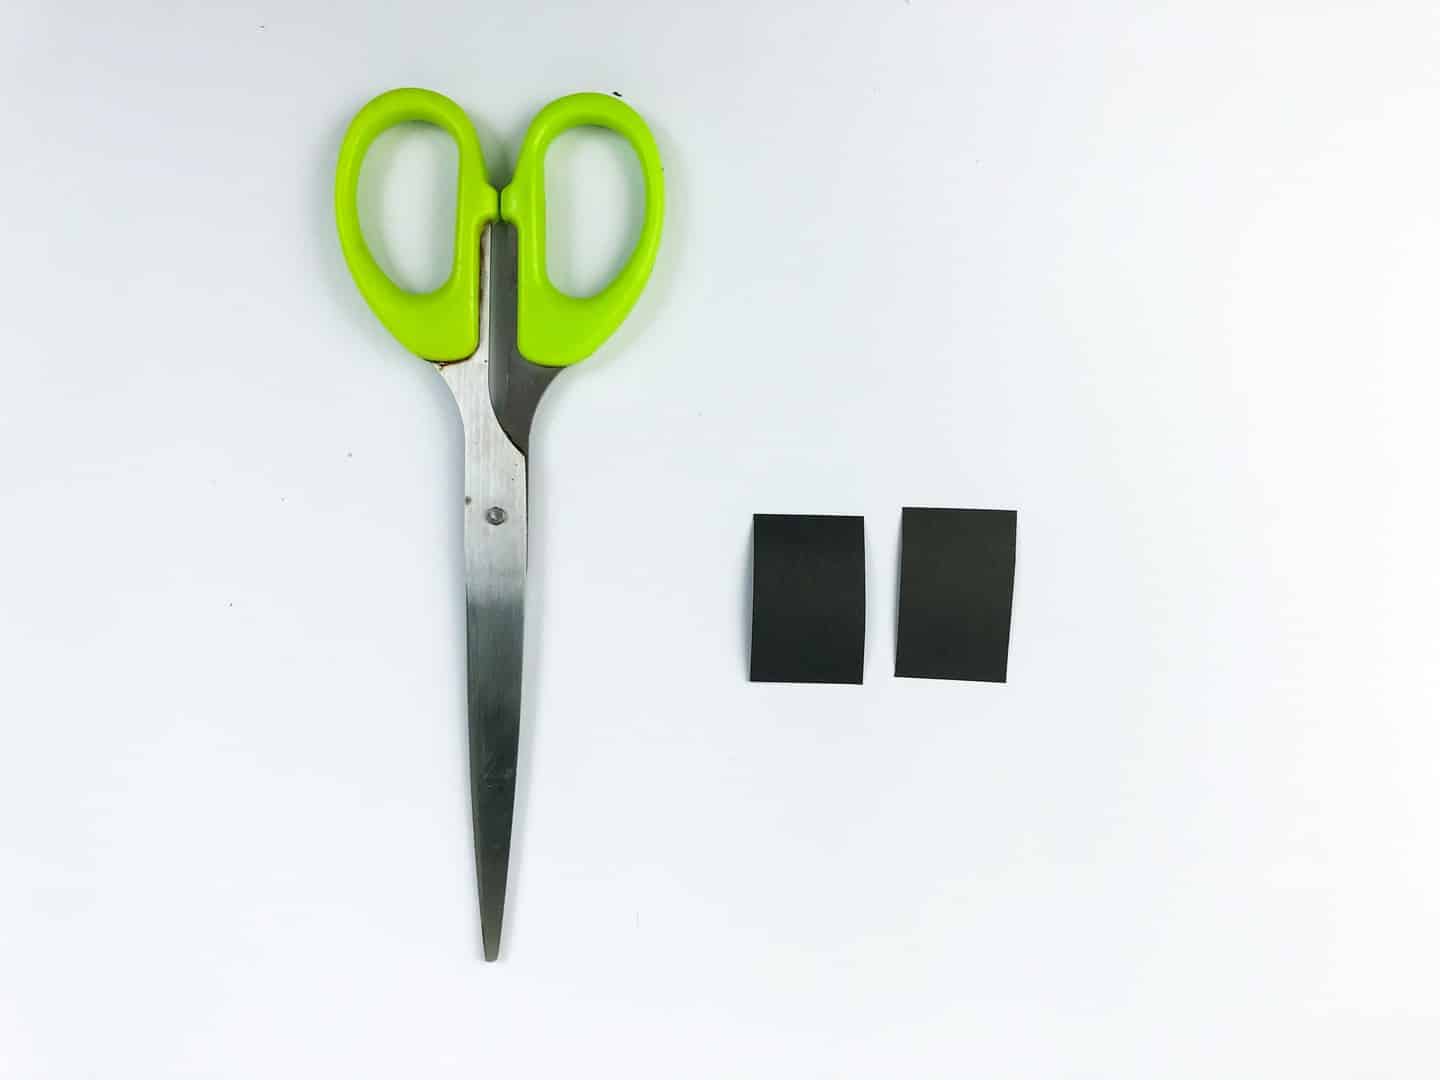
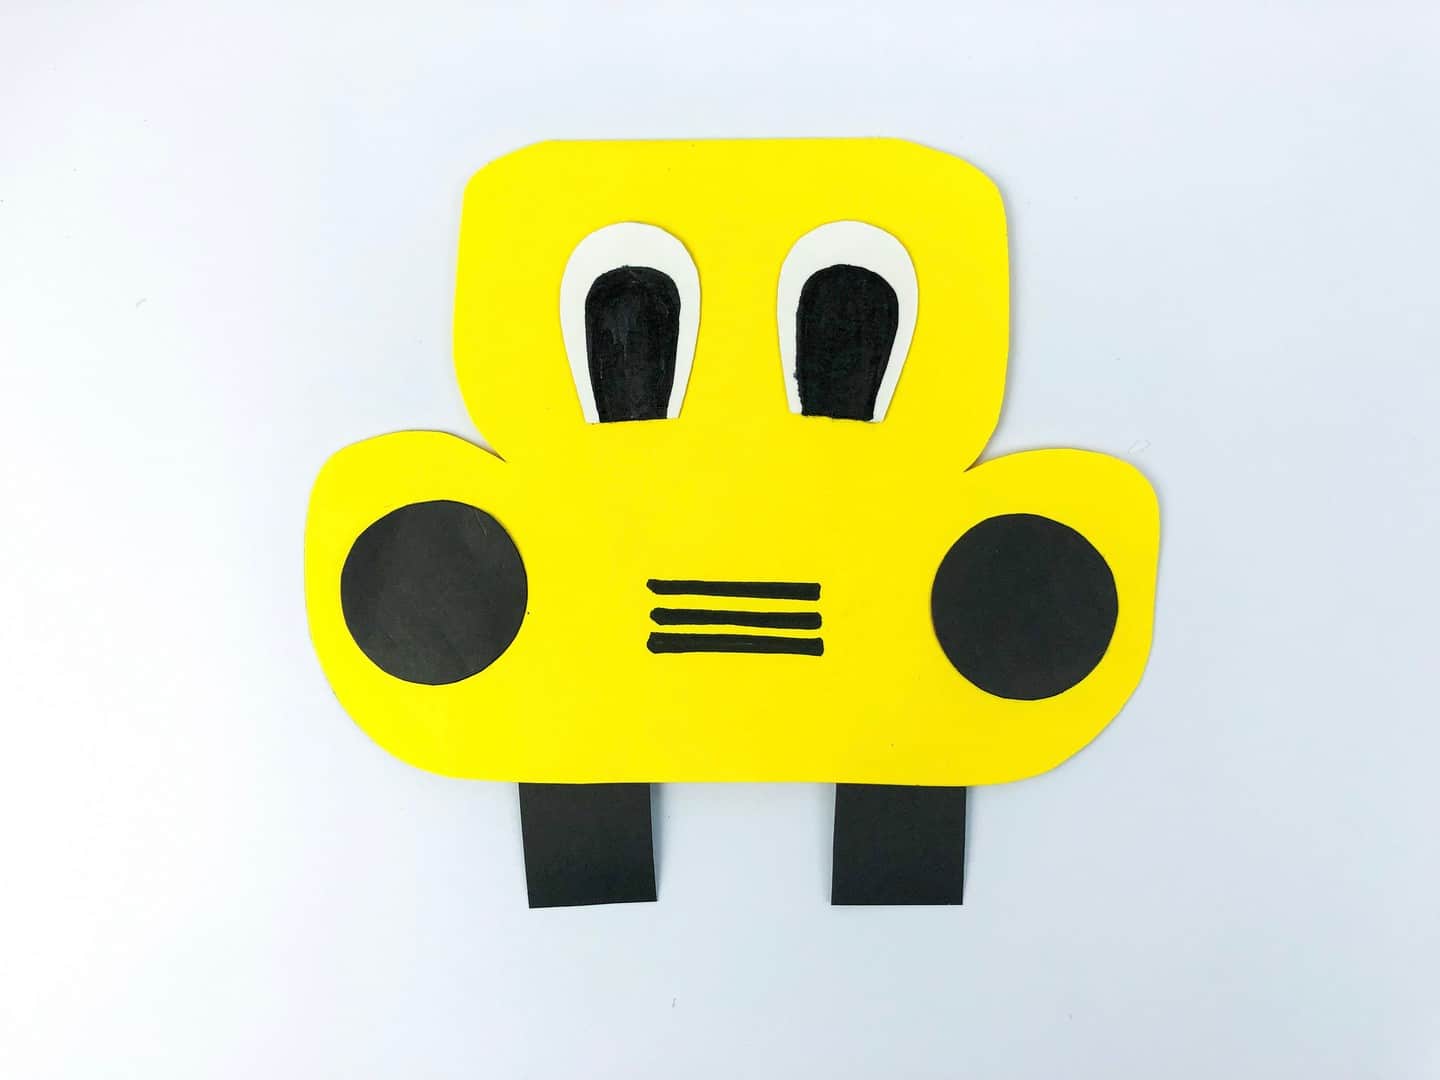
- Cut out two rectangles from your black paper to act as tires.
- Glue on your tires on the back of the card.
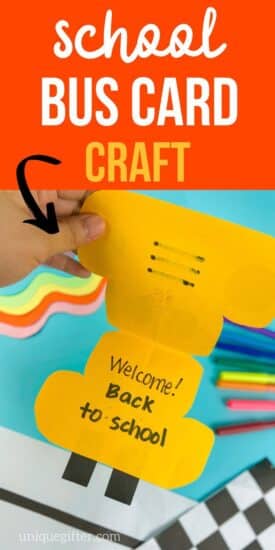
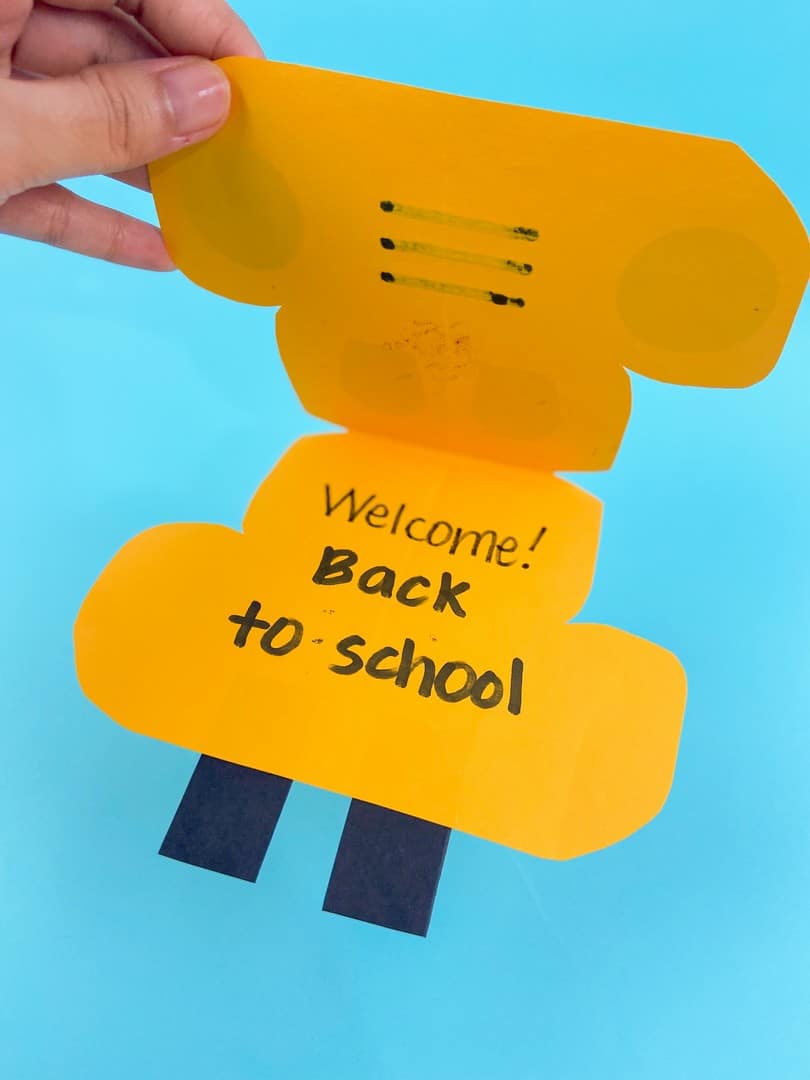
- Open up your card and write a special message, this can be anything you wish!

- Ensure your write it the correct way. (If the kids making it are too little to spell on their own consider using a pencil to write it and have them trace over it with a marker).
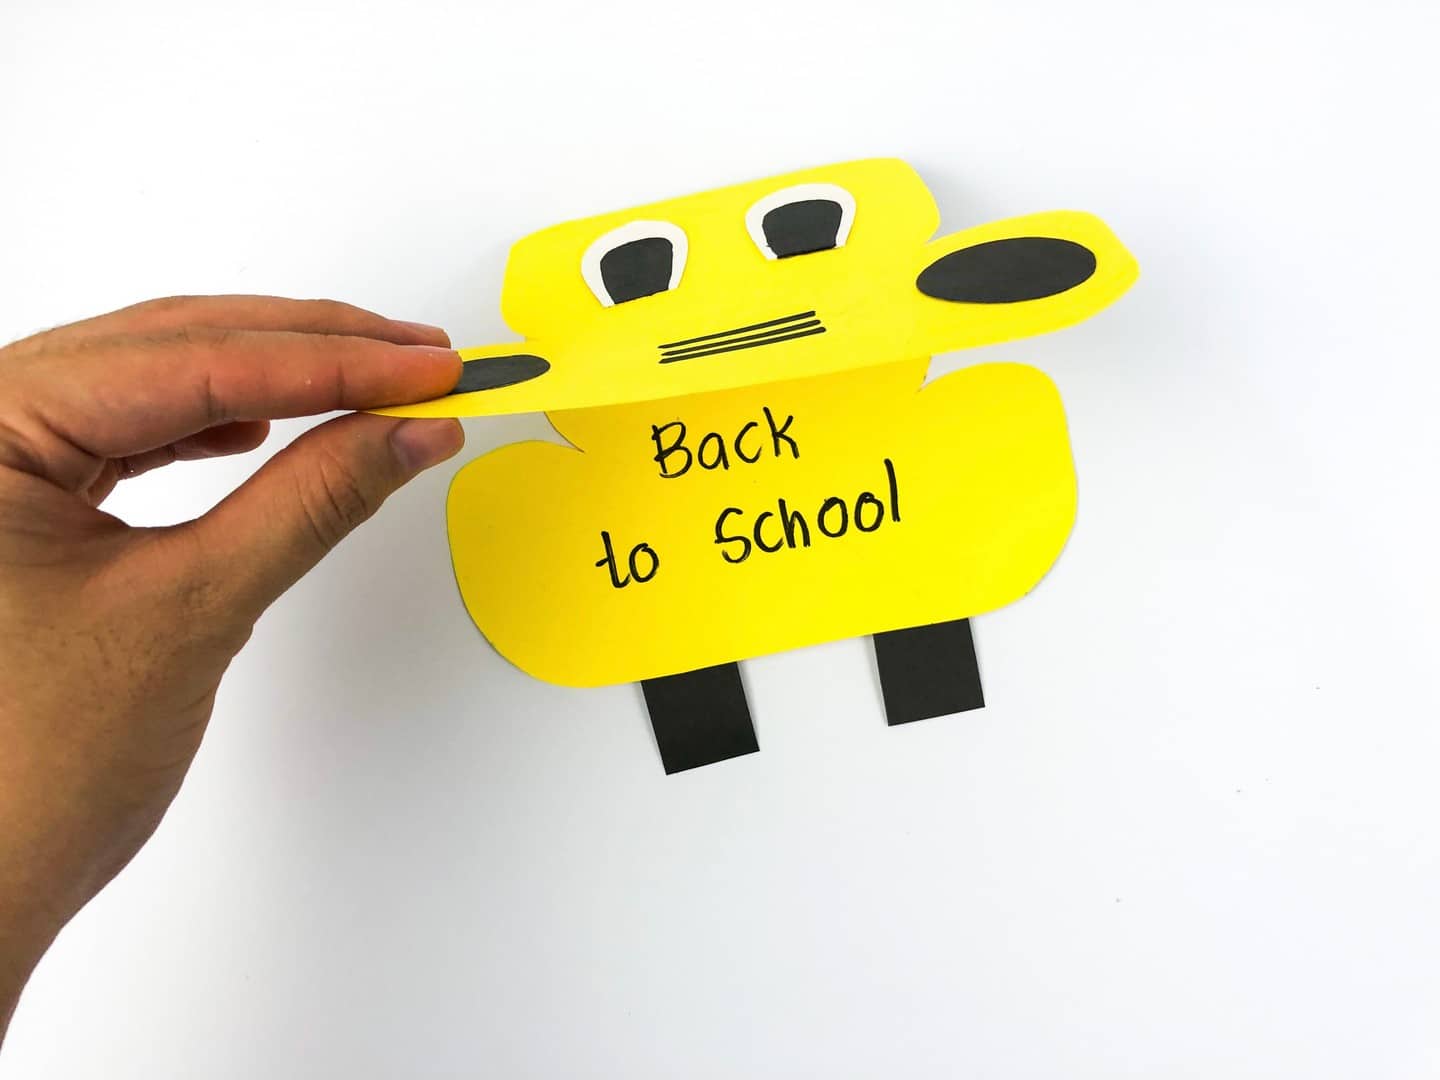
- Enjoy your DIY Back to school card!
School Bus Card Craft

Make the perfect back to school craft every kid will have a blast making!
Materials
- Yellow Paper
- Black Paper
- White Paper
- Pencil
- Black Permanent Marker
- White Liquid Glue (or glue stick)
- Scissors
Instructions
- Take your white paper and trace your bus outline, eyes, and wheels. These will act as your tracers for your bus.
- Take your yellow paper and fold it in half.
- Cut out your white tracers and place the circles and eye shapes on your black paper. Take your bus shape and place it on your yellow paper. Ensure the top of the bus is where its folded.
- Use your black permanent marker and trace around your bus shaped tracer.
- Cut out your bus shape.
- Next, cut out your eyes and circles that will be your headlights.
- Take your permanent marker (or any color marker) and draw pupils on your eye shapes.
- Place your eyes on your bus body and glue them down.
- Place your round circles on your bus body to act as headlights.
- Take your permanent marker and draw three straight lines to act as the front grill.
- Cut out two rectangles from your black paper to act as tires.
- Glue on your tires on the back of the card.
- Open up your card and write a special message, this can be anything you wish!
- You can see the message when you open the card!
- Enjoy your DIY Back to school card!
Recommended Products
As an Amazon Associate and member of other affiliate programs, I earn from qualifying purchases.


Looking for more back to school ideas? Check out our Pretzel Apples Fall School Snack your kids will love! How about a gift for your school bus driver? Check out our collection of gift ideas for a school bus driver.