Disclosure of Material Connection: Some of the links in this post may be "affiliate links." This means if you click on the link and purchase an item, I will receive an affiliate commission. Disclosure in accordance with the Federal Trade Commission's 16 CFR, Part 255. This site is a participant in the Amazon Services LLC Associates Program, an affiliate advertising program designed to provide a means for sites to earn advertising fees by advertising and linking to Amazon.
Some of us live to wrap our Christmas presents once a year. Matching the wrapping paper to each person or gift. Picking out the right ribbon and the perfect gift tags. Nothing makes them happier than the smell of Scotch Tape and the sight of perfectly wrapped, color-coordinated presents under the tree. To that end, check out our beginner’s guide on how to wrap presents.

To some people, all of this comes as naturally as breathing. They know exactly how large the paper needs to be cut, without measuring. They always buy the right amount of paper (never too much, never so little that they can’t finish wrapping). Every fold they make goes exactly the way they want to. And in the end, everything looks perfect.
Some of us, however, aren’t so lucky.

If you’re one of these people then you’ll recognize a few of the following horror stories. The corners are not sticking down no matter how much tape you use. The paper is not quite meeting in the middle. Lumps where you’ve tried (and failed) to fold in the corners. Trying to guide your scissors through the paper, only for the blade to catch and tear a massive hole in the paper.
And after all this torture – the present looks worse than when you started. So you resign yourself to going to the store to get a gift bag.
We used to be just like you, then we spent one Christmas wrapping presents in a retail store – where we learned the tricks that you are going to learn in this article. We’re going to take you from a hopeless wrapper to a gift wrap god (in less than 20 minutes).
Before we jump into the present wrapping guide, we’re going to take a look into the history of wrapping and why we do it.
Table of contents
Why Do We Wrap Presents?

While the other popular birthday and Christmas tradition – giving cards – only dates back to the 1800s. It seems that humans have been wrapping gifts since around 160 CE. And the gift box has been around for much longer than that. The earliest of hiding gifts in a box dates back to the Ancient Egyptians.
So, let’s start the story at the beginning and find out how we got to the modern form of gift wrapping.
Three Kingdoms Period, Korea – The first Evidence of Gift Wrapping
The Korean Three Kingdom‘s period lasted from 56 BCE – 866 CE, and it was in this period of history where we have the first evidence of gift wrapping.
This evidence comes from a record of the Korean Religious folklore. The people who followed this religion believed that giving a wrapped gift would bring the receiver of the gift extra luck.
Therefore, they would wrap any of the gifts they gave in fabric before giving it.
The Gap
There is a gap of nearly 1500 years before we find evidence of another society that takes part in gift wrapping. Why might this be?
Well, wrapping gifts is a very extravagant and wasteful act. Especially, before the age where paper and fabrics are mass produced. It may have cost just as much to buy the wrapping materials as it would have cost to buy the gift.
This is why we believe gift wrapping is something that has only been adopted by cultures in the last 200 years.
That is not to say that people didn’t protect their gifts while giving them.
We have evidence of chests and boxes being used in multiple societies from Ancient Egypt right the way through to the modern day.
The Three Wise men are often depicted as carrying wrapped presents as they visit Jesus. However, records show that they actually brought their gifts in three small chests. However, these depictions of the men carrying gifts are thought to be why present wrapping is so closely intertwined with the festival of Christmas.
Possibly the most controversial gift that was ever given in a gift chest was the Tennis Balls that the Dauphin of France sent to Henry V. This led to the English King invading France and the infamous battle of Ashencourt.
So, there is a large gap between the first recorded gift wrapping and the next instance. People were still using chests and boxes to protect and make an event of opening gifts.
The Tokugawa period, Japan – Furoshiki
The Tokugawa period provides us with the next oldest record of wrapping presents. This record is from the 1600s – where we see the art of Furoshiki being mentioned for the first time.
Furoshiki (put simply) is the art of wrapping gifts in fabric. It was also used to make the transporting of goods safer and easier.
Traditionally, Furoshiki wraps were square and made of silk or cotton. Depending on the means of the person using them they could look like anything – from plain cotton with frayed edges to silk with patterns weaved through it and even hand-painted fabrics.
It is more common for synthetic materials like nylon to be used for modern Furoskiki wrapping.
The two traditional dimensions for Furoshiki squares are 45 × 45 centimeters (17 × 17 inches) and 70 × 70 centimeters (28 × 28 inches). However, these were not strict and many worked with whatever they had to spare.
After the second world war, Furoshiki started to die off. Historians blamed this on the start of paper and plastic mass production.
What is interesting to note, is that as the West has become more concerned with how much waste they have been creating. And with the recent revelations that most shop-bought wrapping paper isn’t recyclable – Furoshiki is rising in popularity again. With people seeing wrapping presents in cloth as a more environmentally friendly option to plastic coated paper wrapping.
A small note on religious wrappings
There is quite a lot of evidence that fabrics were used throughout history to protect religious texts. We saw this happen in all of the major religions.
Some of the oldest surviving evidence of this dates back to the 1300s. Archeologists have found surviving Bojagi from this time. Bojagi is a similar process to Furoshiki but appears to have originated from the methods Buddhist monks used to protect their holy books.
The rise of Christmas cards and wrapping with paper
After having existed for over a thousand years, what caused present wrapping to make the switch from fabric to paper.
Well, it’s thanks to two important developments – the invention of the printing press and the rise of Christmas cards.
During the 1800s the printing press had developed so much that it was now possible to print paper cards so en masse that the price could be dropped. For the first time, cards like this become available to those who weren’t part of the upper echelons of society.
The lower price of cards led to the craze sweeping across Europe and America. Within a few years, this practice became as important to Christmas as the presents themselves.
Eventually, someone came up with the bright idea to start printing wrapping tissue paper that matched the cards they were producing. This meant that cards and presents could be sent in co-ordinated looking bundles. By the start of the 20th century, this was common practice across both Europe and America.
The invention of wrapping paper – 1917, Kansas City
We have a pair of American brothers to thank for the invention of wrapping paper. You may be surprised to learn that the company Hallmark is responsible for this birthday and holiday tradition.
The company began with one store in Kansas City that was run by the Hall brothers. Every year they printed their cards with matching tissue paper wrapping. However, in 1917 they ran out of tissue paper wrapping before the end of the season. They were able to get any more tissue paper. They could, however, get their hands on a lot of wallpaper.
That year they started to print their designs onto wallpaper, it was such a hit that the company had opened up many stores across the country selling this new type of wrapping paper.
It is strange to think that this Christmas tradition comes from America when so many of our other holiday traditions come from Germany and the Scandinavian countries (via the UK).
The wrapping paper industry today
Before we move on to how to wrap presents, let’s talk a little about what the wrapping paper industry looks like today.
We Americans are infatuated with wrapping paper. In fact, we spend over 9 billion dollars on it every year – including for birthdays, Christmas, and other events.
The sad news is that the majority of the wrapping paper we buy is not recyclable. Americans produce enough waste from wrapping paper alone to fill 5700 football stadiums. Yes, you read that right. That’s over 4 million pounds of paper waste that can’t be recycled or reused.
There is some good news, however. Many wrapping companies are committing to producing plastic-free wrapping paper. We are also seeing a rise in the popularity of using fabric to wrap gifts.
You can personally make a difference by choosing to support more eco-friendly brands with your money. Or my making your own wrapping paper or recyclable substances. We will cover how you can do this in the next section.
While you are wrapping your next set of presents you may want to spend some time thinking about the history of wrapping presents. And how it connects you to people throughout history. These lives date back at least 2000 years.
What You Will Need

If you know a few great wrappers then you will notice that they all have one thing in common – they prepare for a session of wrapping.
We’re not saying that you should down an energy drink and do some warm-up stretches before you get started. But what we are saying is that before you start wrapping you will want to have all of your materials within easy reach of yourself.
In this section, we will talk you through everything you will need to get your wrapping done (like a pro). We are also going to talk you through some DIY and eco-friendly alternatives to many of the items – just in case you’re looking to save a little money, the planet, or both.
Before you start collecting your tools you should take some time to think about how you want your presents to look at the end of the process. Do you want to create a theme? What colors do you want to use – should they be matching, complementary, or opposing? Do you want to use plain wrapping paper or patterned? Do you want your ribbon and gift tags to match the wrapping paper?
These are all things you need to think about before you start – if you want to wrap like a pro.
Wrapping Paper
What do you want your wrapping paper to be made of (paper or fabric)?
What color(s) do you want your wrapping paper to be?
Do you want all of your wrapping paper to match?
How much wrapping paper will you need?
No one will be surprised to see that the first thing you will need to wrap presents is wrapping paper.
When it comes to picking out your wrapping paper it is worth thinking about the questions above. This way you will not waste any money while buying it.
You may even be tempted to buy wrapping paper that isn’t even paper. A slightly more expensive option is to buy fabric to wrap your presents in.
The eco option – make your own
If you’re looking for a more eco-friendly way to wrap your presents – you may want to consider making your own wrapping paper.
You will need to do this in advance of when you need to wrap your presents. So, the paint has time to dry.
You will need to buy yourself some rolls of crafting paper. You can usually get this for $5 for 20+ meters.
Firstly you will lay down a base coat paint. This will be the main color of your paper. Then you will want to use a stencil or stamp of the pattern you want to decorate the paper. If you are doing this with little ones you can make the stamps together out of potatoes.
Scissors
Are your scissors sharp enough?
Make sure you have a pair of fairly sharp scissors that can cut through both paper and any ribbons you are going to use.
You may find it easier to use a bigger set of craft scissors if you have a lot of presents to wrap. Using smaller scissors can lead to cramps.
Ribbon
What color ribbon do you want? Do you want it to match or juxtapose your paper?
What material do you want your ribbon to be made from?
The first step of picking out your ribbon is to choose the color of your ribbon. You can pick a ribbon that matches or compliments your wrapping paper. Or you can choose a color of ribbon that completely clashes with the paper.
People used to use string to tie up their parcels. But as time has gone on and our wrapping paper has got fancier we have turned away from string to the more elaborate ribbon.
These ribbons were originally fabric but plastic ribbons are becoming increasingly popular and common.
However, plastic ribbons cannot be recycled. But there are many other options that you can use if you want to use something more eco-friendly.
The eco option – make your own
The things that you can use for an eco-friendly alternative to ribbons are only limited by your imagination.
Here are a few ideas that we came up with:
- Braids made from embroidery thread
- Plastic-free string
- Sliced ribbons of fabric leftover (from your personal stash or a fabric shop)
- Paper painted to look like ribbon.
Gift Tags
Do you want to use a gift tag?
What shape do you want your gift tag to be?
Do you want a foldable gift tag?
What color/pattern do you want your gift tag to have? Does it have a connection to the pattern/color on your wrapping paper or ribbons?
How will you attach your gift tag?
The gift tag may be our favorite part of the wrapping. You can use it as a last flourish to bring the whole thing together.
Gift tags can be tied onto the ribbon or taped directly onto the wrapping paper.
When you are picking out a gift tag (or making your own) you can pick one that matches your wrapping paper or continues along the same theme. Personally, we like to pick gift tags that compliment our wrapping paper. For example, if we have Santa on our wrapping paper we might pick a reindeer or elf as a gift tag.
The eco option – make your own
Lots of gift tags are made out of plastic or covered in glitter – neither of which can typically be recycled.
Why not use some of your leftover crafting paper from making the wrapping paper and whip up a few gift tags as well.
Gift Boxes
Secure Fragile Gifts Within The Box
When it comes to gift boxes there are two options:
- A plain gift box that you can wrap in paper
- A decorative gift box that doesn’t need to be wrapped.
Gift boxes are designed to keep fragile items safe. But they are also a lifesaver if you are not very good at wrapping. It is a lot easier to wrap a box than something with protruding parts.
We think there is merit when it comes to using both types of gift boxes. However, you are here to learn how to wrap – so don’t cheat by putting everything in a box or gift bag!
Clear Tape
If anything in this article changes your life – it will be this tip.
One of the worst things about wrapping is having to battle with the sellotape. In a role, it is awkward to use and often sticks to itself. To take the hassle out of wrapping you need a tape that you can easily use with one hand.
We have the answer.
Circular package tape – we first discovered these sticky dots when we were gift wrapping for a retail store. We will never go back to wrapping with normal sellotape again.
The Process – wrapping with Furoshiki
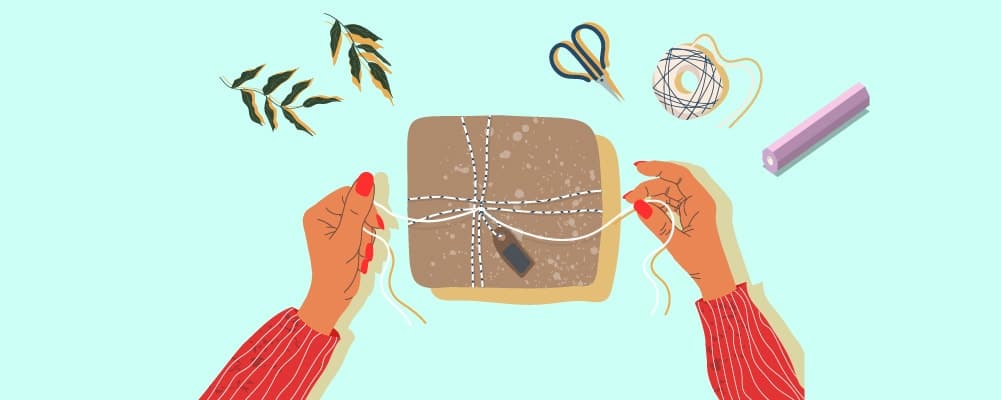
Before we look at how to wrap presents using paper, we are going to take a quick look at the Furoshiki method.
As mentioned before, this is a method where you tie the present up in fabric rather than paper. This may be a little more expensive than using paper, but the fabric is easy to reuse.
This method has become more popular as it is more eco-friendly than using plastic coated ribbons and paper. Nothing but the Furoshiki square of fabric is required to complete this process – but you may wish to add ribbons and gift tags for decoration.
Step 1
Place your fabric pattern side down. Put your box or item onto the fabric at a diagonal angle to the square of the fabric.
Step 2
Take the top right hand corner of the fabric and pull the material completely over the front of the box. The corner itself should rest on the left side of the box. Make sure it is tight.
Step 3
Taking the bottom left side of the fabric repeat STEP 2.
You should be left with a box that is completely covered. With the bottom right and top left corners of the fabric left where they started.
Step 4
Take the two remaining corners and draw them into the middle of the fabric – directly over the middle of the box.
Step 5
Use the two corners to tie a knot. Make sure the fabric is as tight as you can possibly get it (without damaging the present). You can then use any spare fabric to make a bow or double knot.
Step 6
If you want to, you can now add a ribbon or a gift tag. These will only be for decoration as the parcel should not come undone until the person wants to open the parcel.
The friction of the fabric will hold together better than any tape will.
The Process – wrapping with paper

It’s finally time to jump into the wrapping process. We recommend you read the whole set of instructions at least once before you start wrapping.
TOP TIP – before you get started, you should prepare everything you need in advance. Get out all the gift wraps you will need. If you are using any boxes, put them together before you start wrapping. Prepare the sticky dot tapes you are using.
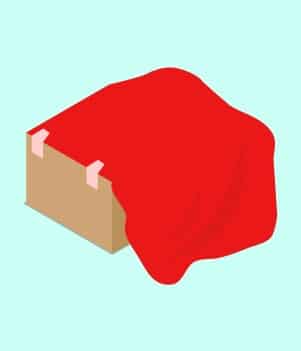
#1 Cut The Wrapping Paper To Fit The Entire Box

You’re going to start by cutting your wrapping paper down to size.
Layout your box and roll it over once – this will give you enough material to wrap the box completely. Make sure you leave enough space above and below the box to wrap the sides.
When you are happy that you have enough paper measured out, cut it to size. Lay the paper pattern side down on the table.
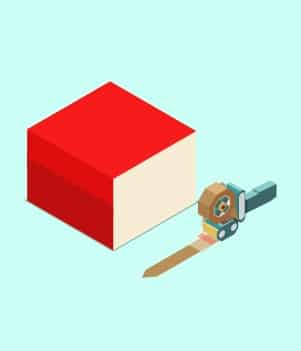
#2 Secure The Paper to The Box With Tape
Make sure that you have cut enough paper by folding the paper so it meets in the middle at the front of the box. Check the edges fit the top and bottom of the box. Cut away any excess paper as this will cause lumps. Or repeat the previous instruction if the size is wrong.
Next, you will want to take one of your sticky dots in hand.
Take one side of the paper and fold it over the front of the box then use a sticky dot to secure the paper there. This trick will help you to keep the paper tight as you wrap.
#3 Fold Over The Edge

Now you will take the edge that is not secure and fold it under to give yourself a crisp edge. Bring your newly folded edge to meet the taped edge.
#4 Join The Ends With The Paper
Take another sticky dot and join the two paper edges together towards the top of the box – around a third of the way down the box. If you have any extra paper you should let it overlap so the folded edge hits the edge taped to the box.
Then take a second sticky dot and repeat the process about a third of the way up from the bottom of the box.
Using two dots will make the paper less likely to unravel.
#5 Close Open Ends

Now we are going to deal with the ends of the box. You will need at least one sticky dot for each end.
#6 Prepare your end flaps

Before we seal the first end, we want to prepare the folds. To do this you will need to use your nails or fingertips to crease the paper.
Start by making a crease along the right side of the front of the box. When you reach the end of the box, continue to make the crease but at a 45-degree angle. This will create a triangle wing that will fold neatly when you need it to.
Repeat this on the left side.
You will want to make a crease at the two bottom ends of the box. The paper should fold then flat against the box from the top and bottom.
#7 Seal the ends

Now that you have your flats, you are going to fold in the top and bottom flaps. If you struggle with wrapping you can use a sticky dot to pin them down while you work on the side flaps.
You will then want to fold in the side flaps. Start with the left one and fold it down with a finger while you fold in the right one. Then use a sticky dot to pin them both down.
Side one – complete!
Repeat steps five through seven on the box’s remaining open end
You will need to repeat steps #5 through #7 to the other end of the box now.
While you are doing this, the sticky dot from the other end may pop off. If this happens, don’t worry. Your ribbon is going to be holding it down later. You just need to stick that dot back down so the rest of the wrapping doesn’t come loose while you finish this end.
Add The Ribbon

Now it’s time to add your ribbon. A top tip to move the box rather than the ribbon when you are measuring everything out. This will give you a tighter fit.
If you have a longer side, wrap the ribbon twice around that end then do an extra ¼ so that the ribbon is at the front of the box in the middle. Turn the box ¼ and wrap the ribbon twice around the shorter side.
Here you will cut the ribbon with enough spare to make a knot or bow.
Make A Double Knot

Here you can either tie a double knot or a bow.
Whichever you decide to do, make sure that the ribbon is pulled as tight as possible. The tighter it is, the neater it will look.
Then Trim The Ends

Now it is time to trim off any of the excess lengths that is on the ribbon.
The only thing that you may want to leave extra ribbon for is the gift tag- if you are going to attach it using the ribbon.
Add Your Gift Tags

The final step is to add your gift tag.
There are two ways you can do this.
You can attach it to the ribbon – you will need to leave some excess on the ribbon beforehand to do this.
Or you can use a sticky dot to tape down the gift tag. There is no right place to put a gift tag but most people avoid putting it on the bottom of the present.